
If your Gaggia Classic Pro is humming but pulling no water, the culprit is almost certainly a blocked or failed three-way solenoid valve. This is the mechanical heart of the machine’s pressure relief system. You are likely dealing with scale buildup or a seized electromagnetic plunger caused by debris in the hydraulic circuit.
The Mechanics of the Three-Way Solenoid Valve and Pressure Dynamics
The Gaggia Classic Pro, in all its iterations (from the older RI9303 to the newer EVO models), relies on an ULKA vibration pump to force water through the brew group. However, the machine’s ability to "dump" pressure immediately after a shot is mediated by the 3-way solenoid valve. When you flip the brew switch, the solenoid coil energizes, pulling a metal plunger upward, opening the path from the boiler to the group head.
When you flip the switch off, the coil de-energizes, the plunger drops, and it creates a path to the drip tray, venting the group head’s residual pressure. If this valve fails—specifically if the plunger is stuck in the "closed" or "mid-way" position due to calcium carbonate deposits (limescale)—the pump will fight against a physical barrier, resulting in that distinct, strained "buzzing" sound and zero output, much like how a Philips 2200 LatteGo can get stuck on a calc-clean cycle.
Troubleshooting the Hydraulic Flow Path: Why Scaling is the Invisible Enemy
Before tearing into the solenoid, you must differentiate between a pump failure and a valve blockage. If the pump is silent, it’s an electrical issue or a dead pump. If it’s loud, vibrating, but stagnant, you are dealing with a blockage.
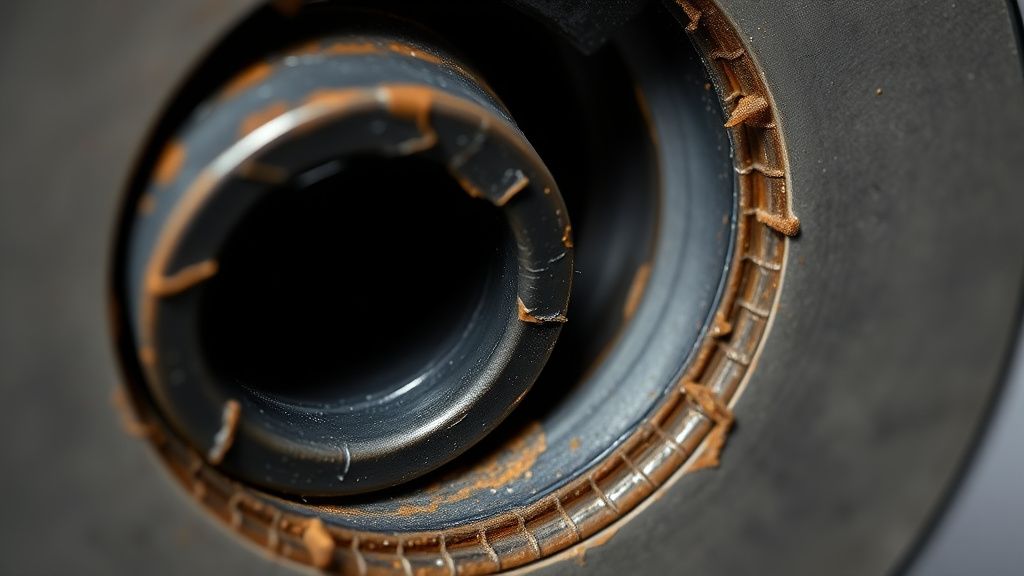
The Scaling Reality: Most home baristas ignore the descaling cycle until the machine literally stops working. In regions with hard water (high magnesium and calcium carbonate content), the solenoid valve’s small internal orifices become perfect traps for flakes of scale breaking off from the aluminum boiler. Unlike a stainless steel boiler, the Gaggia’s aluminum construction reacts differently to acidic descaling agents; if you use a solution that is too aggressive, you risk pitting the boiler interior, which creates more "fuel" for future clogs.
Step-by-Step Solenoid Valve Disassembly and Cleaning
- Safety First: Unplug the unit. Wait at least 30 minutes for the boiler to cool. A burn from a pressurized Gaggia boiler is not just a standard household injury; it’s a trip to the ER.
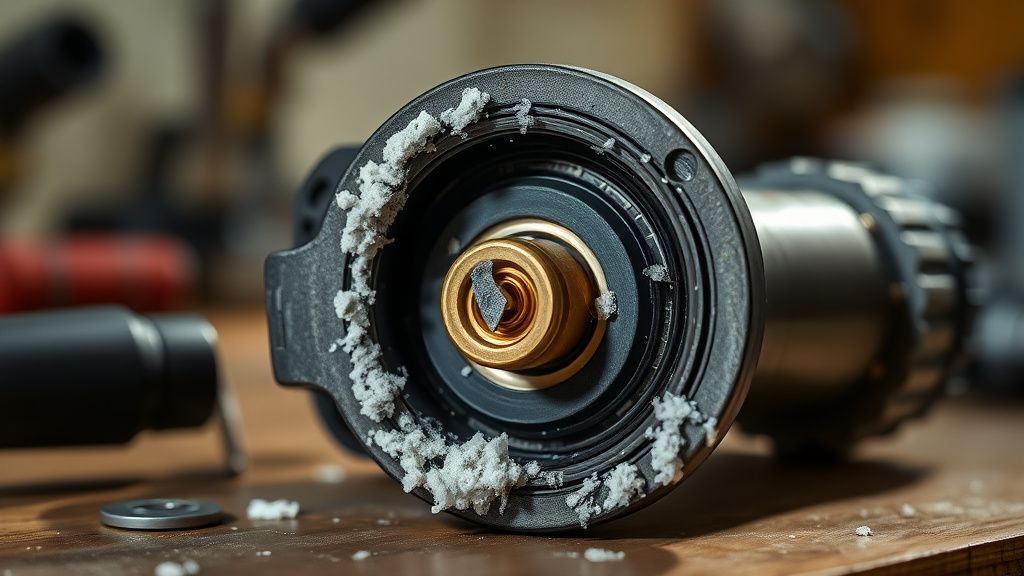
- Accessing the Valve: Remove the top tray and the two screws holding the top cover. You’ll see the solenoid mounted directly on top of the boiler—a brass block with a black electromagnetic coil attached.
- Coil Removal: Unscrew the nut on top of the solenoid coil. Slide the coil off. You will see a brass stem.
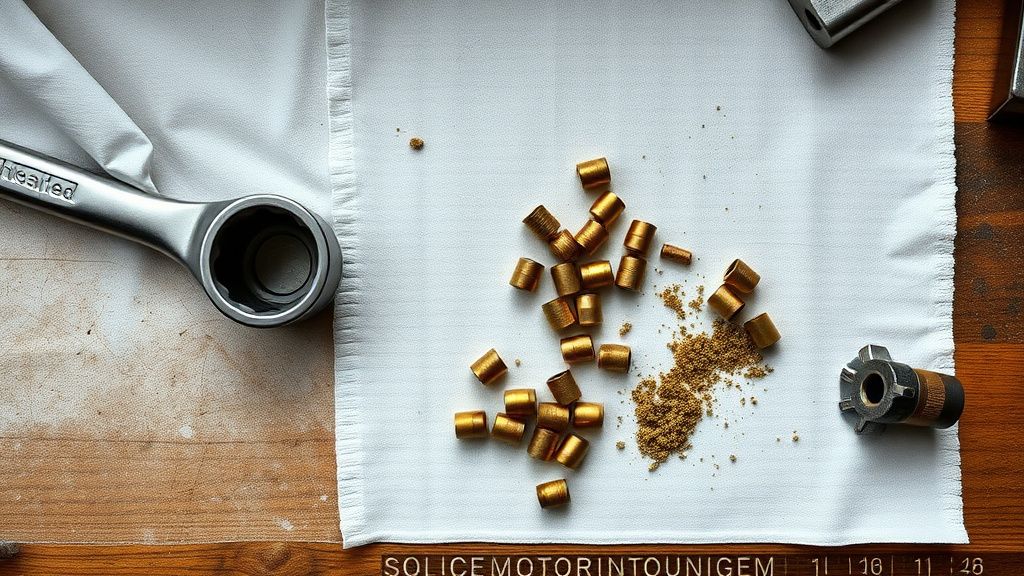
- The Extraction: Use a deep-well socket (usually 14mm or 17mm depending on the specific model year) to unscrew the brass solenoid stem from the boiler. Be careful: the brass is soft. Do not use an adjustable wrench if you can avoid it, as you’ll strip the corners.
- Internal Inspection: Once removed, you will find the plunger and a small spring inside the stem. If these don't move freely, you have found your problem. Use a cocktail stick or a fine needle to clear the debris.
- Descaling the Valve: Submerge the valve parts (not the electrical coil!) in a mild citric acid solution or a dedicated coffee machine descaler (like Puly Caff) for 20-30 minutes.
Counter-Criticism: The "Replace vs. Repair" Debate
There is a fierce debate on forums like r/espresso and Home-Barista.com regarding whether one should repair or replace the solenoid.
- The Purist Argument: "If it's scaled once, the integrity of the O-rings is compromised." Proponents of this view argue that replacing the entire solenoid assembly (which costs around $40-$60) is the only way to ensure another 5 years of service. They claim that manually cleaning a pitted valve seat will eventually lead to leaks.
- The Realist Argument: Many long-time Gaggia techs argue that these valves are "over-engineered" for their purpose. They suggest that as long as the rubber seals aren't perished, a simple citric acid soak is sufficient. However, the operational reality is that the O-rings in the Gaggia Classic Pro are prone to flattening after a few heat cycles.
My take as a technician: If you have to take it apart more than once, just buy the new valve. Your time is worth more than the $50, and the frustration of a machine leaking inside the chassis—potentially causing a short circuit on the PCB or the brew switch—is not worth the "frugality" tax.
Common Failure Points: Scaling, Seal Degradation, and Electrical Fatigue
When you are diagnosing your "no water" issue, look for these three specific failure modes:
- The "Seized Plunger" (Mechanical): The mineral build-up has physically welded the plunger to the stem. The magnet isn't strong enough to overcome the friction.
- The "Seal Perish" (Rubber): The rubber tip of the plunger has hardened. It no longer forms a seal, causing water to bypass into the drip tray instead of the group head.
- The "Coil Burnout" (Electrical): Rare, but happens. If the valve is blocked, the coil stays energized longer than designed, causing it to overheat and fail. You can test this with a multimeter by checking for continuity across the two terminals of the coil.
Operational Reality: Scaling and the "Gaggia Shuffle"
The internet loves to talk about the "Gaggia workflow," but no one talks about the "Gaggia maintenance debt." If you use tap water, you are playing a game of Russian Roulette. I’ve opened machines in London and Istanbul where the solenoid was literally packed solid with white powder.
Some users attempt to use "workarounds" like backflushing with harsh detergents (like Cafiza) way too often. While backflushing is necessary for the group head screen, it does not clean the solenoid. In fact, if your machine is already struggling, backflushing can push sediment into the solenoid valve, turning a minor flow issue into a total blockage. Stop backflushing if your flow is already restricted.
Deep Dive: Scaling Patterns and Water Chemistry
Why do some Gaggias last 10 years without a solenoid failure, while others fail in 18 months?
- Water Hardness: If your water has a high TDS (Total Dissolved Solids) count, specifically high calcium, your machine is a ticking clock.
- Thermal Cycling: The Gaggia Classic Pro is a single-boiler system. The boiler water sits near the boiling point constantly if left on. This rapid heating and cooling cycle accelerates the precipitation of minerals.
- The "Descaler" Fallacy: Using vinegar. Don't do it. It’s too acidic and leaves an odor that permeates the aluminum boiler, affecting the flavor of your espresso for months. Use professional-grade citric or tartaric acid-based descalers.
How do I know if the solenoid valve is the cause of my Gaggia’s "no water" problem?
If the pump hums, the tank is full, the group head is clear, and the boiler is hot but no water flows from the group head or the hot water wand, your solenoid is likely blocked or dead. You should also check if any water is coming out of the OPV (Over Pressure Valve) discharge tube. If all the water is going into the drip tray, the solenoid is stuck open.
Can I just use a paperclip to clear the solenoid?
Absolutely not. The internal bore of the solenoid is extremely sensitive. If you scratch the interior wall or the valve seat with a metal paperclip, you will create a permanent leak path, and the valve will fail to maintain pressure. Always use a wooden toothpick or a very soft plastic pick.
Why does my Gaggia solenoid "buzz" loudly?
A loud, buzzing solenoid usually indicates that the coil is struggling to hold the plunger up. This is often caused by a voltage drop, a faulty electromagnetic coil, or excessive physical resistance from scale inside the stem. If the hum is constant, it’s a clear sign of impending failure.
What is the difference between the Gaggia Classic Pro solenoid and the older model solenoids?
The newer Gaggia Classic Pro (and the Evo) uses a slightly more integrated solenoid assembly. While they are physically interchangeable with older Gaggia Classic parts, the mounting hardware is often tighter. Always verify the manufacturer part number on the side of your solenoid coil before buying a replacement.
Is it safe to leave the solenoid soaking in vinegar?
No. Vinegar (acetic acid) is corrosive to the aluminum boiler components it touches during the cleaning process and can leave a lingering acidic taste. Furthermore, it is often ineffective against heavy, calcified, "hard" scale deposits that have been building up for years. Use commercial descaling agents formulated for espresso machines.
Should I replace the O-rings if I open the solenoid?
Yes. Every single time. Once a rubber O-ring has been compressed by the heat of the boiler, it loses its elasticity. If you reuse an old O-ring, there is an 80% chance it will leak upon reassembly, forcing you to drain the boiler and take the entire assembly apart again. Always keep a set of Viton or EPDM O-rings on hand.