
Quick Answer: The Gaggia Classic Pro stops heating almost always because a thermal fuse has blown, much like how users must troubleshoot the Bosch Dishwasher E15 Error to restore their appliances to working order. You cannot reset it. You replace it. The part costs under $10, the job takes 30 minutes, and it is the single most common non-user-serviceable failure point on this machine.
Let's be honest about something first. The Gaggia Classic Pro has a well-earned cult following, and most of the people who own one genuinely love it. But there's a specific failure mode that sends hundreds of users to Reddit, HackingCoffee forums, and random Italian appliance repair threads every single month — and the symptoms are almost always identical. You press the power button and the pump light comes on, but the boiler never gets hot; this is a frustrating experience similar to encountering a Nespresso Vertuo Orange Light when you need your morning coffee. No steam and no pressure; it is just dead cold water through the group head, a scenario that requires as much technical patience as resolving a Jura E8 Error 8 regarding brew group stalls. The machine appears alive but produces nothing, leaving users feeling as helpless as those dealing with a Breville Barista Pro Flashing Drop Icon when water flow errors occur.
That's a blown thermal fuse. And almost nobody talks about why it blows, what the chain of events looks like before it does, or what happens operationally inside the machine when it fails. Most guides skip straight to "here's how to open it up." This isn't that guide — or rather, it's that guide plus everything else you actually need to know.
Why the Gaggia Classic Pro Has a Thermal Fuse at All: The Engineering Logic
The Gaggia Classic Pro uses an aluminum boiler — small, roughly 100ml capacity, resistive heating element embedded inside. It's a simple system. A PID (or in the stock configuration, a pressurestat) controls temperature by cycling the element on and off. In theory, the pressurestat cuts power to the heater once boiler pressure hits the setpoint. In practice, that pressurestat can drift, stick, or fail. If the heater element keeps running with no water inside, or with the steam valve stuck closed, temperatures inside the boiler head toward catastrophic territory, necessitating a repair as precise as fixing an Instant Pot Vortex Plus E5 Error.
The thermal fuse is the last line of defense. It's a one-time thermal cutoff — sometimes called a TCO (Thermal Cutoff) — that physically opens the electrical circuit permanently if the temperature at its mounting location exceeds its rated threshold. On the Classic Pro, that's typically a 192°C-rated fuse, though some variants use 184°C or 216°C depending on production run and market. The fuse sits on or near the boiler body, sandwiched under a mounting bracket, in direct thermal contact with the aluminum.
The design is intentional, cheap, and effective, though not quite as complex as the systems required for How to Debug DAO Treasury Errors: A Technical Guide for Governance. Resettable thermal cutoffs exist — they're called thermal breakers — but Gaggia, like most boiler-based espresso machine manufacturers, uses one-shot fuses. Why? Cost. A resettable breaker in a pressurized steam environment introduces mechanical complexity. A one-shot fuse is $2, requires no maintenance contract, and after it blows, the failure mode is safe: the machine does nothing. You can't accidentally restart a machine with a stuck-open steam valve just by cycling power.
The engineering argument is defensible. The user experience argument is less flattering. When this fuse blows on your kitchen counter at 7:15 AM, you don't care about design philosophy.
The Real Failure Chain: What Actually Causes the Fuse to Blow
Here's where most guides go silent. They tell you to replace the fuse. They don't tell you why it blew or whether it'll happen again. This matters enormously.
Scenario 1: Dry boiler firing The most common root cause. If the machine is powered on before water has fully primed the boiler — or if someone turns it on with an empty tank and the pump fails to fill — the element fires into air or steam vapor. Temperatures spike. The pressurestat might not register correctly because there's no liquid pressure to measure. The thermal fuse blows.
This happens more than you'd think. The Classic Pro's pump is loud and gives audible feedback during priming, but users who are unfamiliar with the priming sequence sometimes interpret silence or pump noise differently than they should.
Scenario 2: Pressurestat failure or drift The pressurestat is a mechanical pressure switch. On older units and heavily cycled machines, the internal spring and diaphragm can drift, causing the setpoint to creep upward. If the pressurestat stops cutting power at the correct pressure, the element runs longer than it should, boiler temperature continues rising, and eventually the thermal fuse does its job.
Reddit threads on r/espresso have documented this specific failure chain multiple times. User grumpy_barista_guy described it in a thread from late 2022: "Machine started running hotter and hotter over a few weeks, steam was getting more aggressive, then one morning just — nothing. Opened it up, fuse was gone. Pressurestat was way off spec." Replacing only the fuse without addressing the pressurestat in that scenario means you'll blow another fuse within weeks.
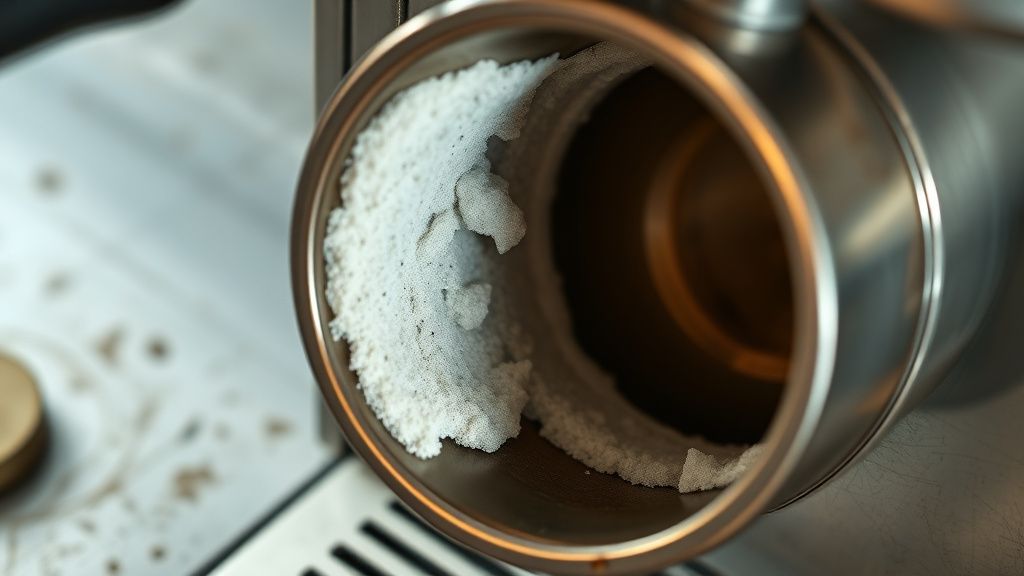
Scenario 3: Scale buildup changing thermal dynamics Heavy mineral scale on the boiler element acts as an insulator. The element runs hotter to push heat through the scale layer. Eventually something upstream — pressurestat, thermal fuse, or element itself — gives. If you're blowing thermal fuses repeatedly and you live in a hard-water area, check your descaling schedule.
Scenario 4: The fuse just aged Thermal fuses have a lifespan. They're rated for specific temperature exposures over time, not just a single catastrophic event. On a machine that runs daily for years, the fuse element can degrade and fail even if the boiler never actually overheated. This is less common but real, and it's why some repair techs recommend proactive fuse replacement during major service intervals on high-cycle machines.
Identifying the Correct Replacement Fuse
This is where fragmentation in the parts ecosystem creates real problems.
The Gaggia Classic Pro (GCP) has had several production iterations. The naming is confusing — Gaggia used "Classic" as a model name for decades, with various internal redesigns that don't always get new model numbers in all markets. The 2019 "Classic Pro" (also called New Classic in some EU markets) uses a Ceme boiler with specific thermal fuse specifications. Earlier machines used different boilers with different thermal fuse ratings.
Ordering the wrong fuse is a real risk. Installing a fuse with a higher temperature rating than the original means you've shifted the safety margin — the machine can now reach temperatures the original design never intended to allow before the fuse trips. Installing a fuse with a lower rating means nuisance trips during normal operation.
The correct fuse for most Gaggia Classic Pro units is:
- Temperature rating: 192°C (±5°C depending on variant)
- Current rating: 10A at 250VAC (minimum — some replacements are rated 15A or higher, which is acceptable as current rating is maximum tolerance, not setpoint)
- Physical form: Axial lead, barrel type, approximately 10mm x 4mm
- Certification: CE or UL marked, depending on market
Always verify the rating printed on the original fuse body before ordering. The number is usually laser-etched or printed in tiny text. If the original is unreadable (common after a high-temp failure), cross-reference against the Gaggia Classic Pro service manual, or post a photo in r/espresso or the HackingCoffee community and someone will confirm within hours.
The Replacement Procedure: What the Service Manual Won't Tell You
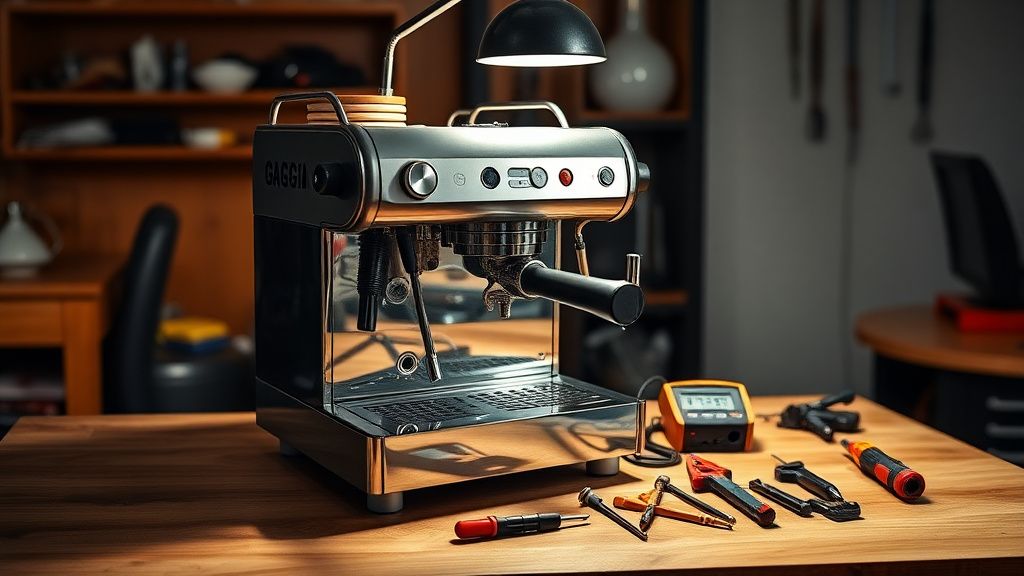
Let's go through the actual procedure. This isn't dramatically difficult, but the Classic Pro's interior is tight, wiring routing is awkward, and there are a few specific things that will waste 20 minutes of your time if you don't know them in advance.
Tools Required
- JIS #2 screwdriver (not Phillips — the screws are JIS, and using the wrong driver rounds them out fast. This is the #1 tool mistake people make on this machine)
- Needle-nose pliers
- Digital multimeter with continuity function
- Soldering iron + rosin-core solder or appropriate crimp connectors
- Heat shrink tubing (if soldering)
- Camera or phone to photograph wire routing before disconnecting anything
Step 1: Depressurize and Disconnect
Unplug the machine. Wait minimum 30 minutes if it was running recently — the boiler retains heat and pressure, and the capacitors in the control circuit need to discharge. Some techs say 10 minutes is enough. Some say 30. The boiler is small; 30 minutes is free insurance.
Open the steam valve to release any residual pressure. You'll hear a hiss if there's anything left. Do this before opening the case.
Step 2: Remove the Top Panel and Side Covers
The Classic Pro's outer casing comes apart in a specific sequence. The top cap screws are accessed from underneath the drip tray shelf area. The side panels have clips at the base and screws at the top. This is where the JIS screwdriver matters — strip those screws and you're into drill-out territory.
Take photos of the wiring harness routing before touching anything. The factory routing is functional and exists for thermal and vibration reasons. You want to replicate it.
Step 3: Locate the Thermal Fuse
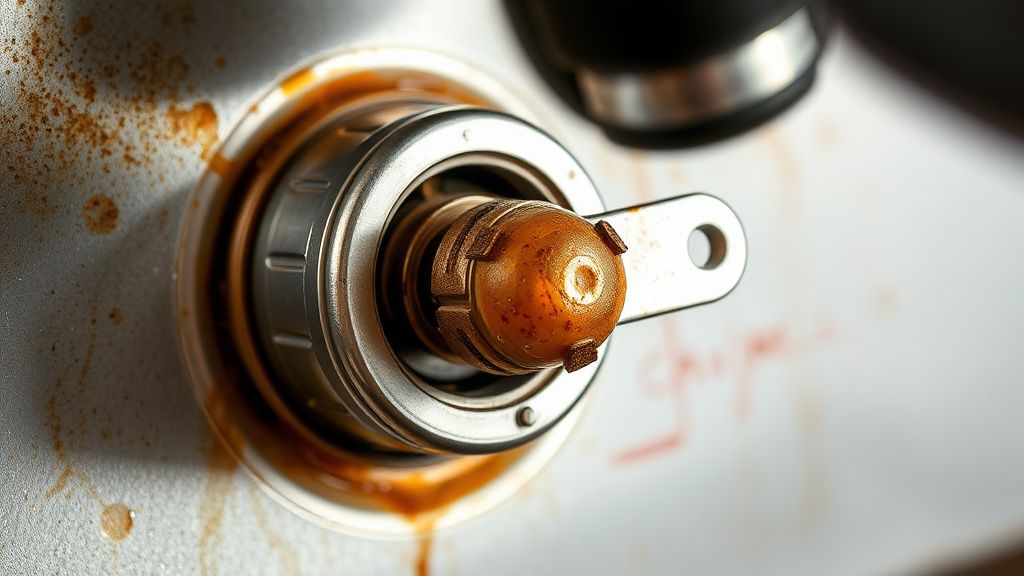
The thermal fuse is mounted directly on the boiler body, typically on the upper section near the element connection point. It's held against the aluminum with a small metal bracket and machine screw. Two wire leads connect to it via push-on terminals (spade connectors on most versions).
The fuse itself is roughly the size of a grain of corn. If it's blown, you usually cannot tell visually — it looks identical to a functional fuse. This is important: don't assume the fuse is fine because it looks fine. Test it.
Step 4: Test Before You Replace
Pull the spade connectors off the fuse. Set your multimeter to continuity mode. Touch the probes to each lead of the fuse. A functional fuse reads near-zero ohms (continuous). A blown fuse reads OL or infinite resistance. No continuity = blown fuse.
While you're in there, also test the heating element itself: check resistance between the two element terminals. A typical small espresso machine boiler element reads somewhere in the range of 20–60 ohms depending on wattage. An open circuit means the element itself is dead, not just the fuse. An element failure alongside a blown fuse sometimes indicates a severe dry-fire event.
Step 5: Address the Root Cause Before Installing the New Fuse
This is the part most guides skip. If your pressurestat is suspect, test it. If your boiler has significant scale buildup, descale before reassembly. If you don't know why the fuse blew, you're playing probabilistic maintenance.
Testing the pressurestat properly requires a pressure gauge on the group head or a dedicated test fitting — this is more involved and can be covered in a separate procedure. At minimum, research your machine's specific pressurestat setpoint spec (typically around 1–1.5 bar on stock Classic Pro) and note whether your machine was running noticeably hotter or generating more aggressive steam than usual before the failure.
Step 6: Install the New Fuse
This is where the soldering vs. crimp connector debate comes in.
The factory wiring uses push-on spade terminals. If your replacement fuse came with pre-attached leads ending in spade connectors, just push them on. Job done.
If your replacement fuse has bare leads, you have two options: crimp appropriate female spade connectors onto the leads (cleaner, more serviceable), or solder the connections (permanent, lower resistance, but now you've added solder joints in a high-temperature environment that will eventually see thermal cycling stress).
Avoid wire nuts. Avoid tape-only connections. This is a 240V/120V AC circuit. The connection quality isn't optional.
The fuse must be in firm thermal contact with the boiler surface. The bracket screw needs to be snug — not over-torqued (the aluminum is soft), but snug. A fuse that's slightly lifted away from the boiler surface reads the air temperature near the boiler rather than the boiler itself, which throws off its response characteristics and — depending on the thermal mass and airflow inside the case — could potentially allow higher-than-intended boiler temperatures before the fuse trips.
Step 7: Reassemble and Test Cold
Before plugging in, manually verify all wire connections are seated, nothing is pressing against a moving part (the pump vibrates significantly), and the case is properly reassembled. Then, with the water tank full, plug in and power on. Listen for pump priming. Watch the boiler light cycle. If everything works correctly, you'll see the ready light cycle within approximately 10 minutes and be able to pull a shot.
Real Field Reports: When the Repair Doesn't Fix It
The replacement works most of the time. But there's a meaningful subset of cases — probably 15–20% based on the volume of follow-up threads seen on HackingCoffee and r/espresso — where replacing the fuse doesn't restore function.
Dead heating element. As mentioned above, severe dry-fire events can burn out the element alongside the fuse. The element is replaceable but more involved — it requires draining the boiler and involves a sealed element connection that's easy to damage if you're not careful.
Pressurestat failure. If the pressurestat is truly dead (not just drifted), the machine will power on, the boiler will heat, but the pressurestat won't cut the element at the right point. This sometimes presents as the machine cycling the heater light erratically, or steam output being dramatically different from normal. Pressurestat replacement is a separate repair.
Wiring harness damage. In severe thermal events, the insulation on wires routed near the boiler can melt or crack. The connections look intact but have intermittent or no continuity. This is found with systematic multimeter testing of each circuit segment.
Wrong fuse installed. A recurring issue in parts ecosystem fragmentation. Someone orders a "Gaggia Classic thermal fuse" and receives a 184°C or 216°C unit that physically fits but has the wrong rating. The 216°C version, specifically, can allow temperatures that stress other components before tripping — you may fix the immediate problem and introduce new ones.
The Ecosystem Around This Repair: Community Knowledge vs. Official Support
There's a specific tension here worth naming. Gaggia's official support position on thermal fuse failures is essentially "send it to an authorized service center." The service manual — which is technically not supposed to be public but circulates freely in the community — describes the procedure but includes warnings that align with warranty preservation rather than user repair.
The community position is essentially the opposite. The GCP has one of the most actively documented DIY repair ecosystems of any prosumer espresso machine. HackingCoffee (now partially archived), the r/espresso wiki, and the Gaggia Classic Owner's Group on Facebook collectively contain more practical repair documentation than Gaggia's official channels do.
This creates a support reality where the actual knowledge lives outside official channels. When a thermal fuse blows and you call Gaggia customer service, you will likely be quoted a service center fee that, depending on region, can approach or exceed the cost of a refurbished machine. The community knows this. The workaround culture is deeply embedded. People film their repairs, post GitHub-style revision histories of their mod procedures, and cross-reference each other's observations with a rigor that would embarrass some corporate QA departments.
The tension isn't purely adversarial. Gaggia's US distributor (Evoca Group North America) has at times acknowledged community modifications with a degree of tolerance unusual in the appliance space. But the official warranty documentation and the actual repair ecosystem exist in parallel, barely acknowledging each other.
Counter-Criticism: Is the Thermal Fuse Design Adequate?
Some experienced repair techs and community members have argued — occasionally loudly — that the Classic Pro's thermal protection system is underengineered for a machine that's marketed as semi-professional.
The core criticism: a single one-shot thermal fuse, with no backup protection, no audible alarm, and no user indication distinguishing "boiler failure" from "pump failure" from "no water" is a poor user experience for a $500+ machine. Competing machines in a similar price bracket — specifically the Breville Barista Express and the Lelit Mara X, among others — implement more layered thermal protection including resettable breakers or more sophisticated pressurestat designs.
The counter-argument from engineers and cost-structure analysts: the