
Quick Answer: Jura E8 Error 8 means the brew group motor unit has stalled, seized, or lost positional feedback. The machine can't complete its internal piston cycle. Fix sequence: manual brew group removal and cleaning first, then motor shaft inspection, encoder wheel check, and gear train assessment. If cleaning doesn't resolve it, you're likely looking at a motor or encoder replacement.
There's a particular kind of dread that comes with Error 8 on a Jura E8. You've had your morning coffee routine dialed in. The machine grinds, the pump pressurizes, everything sounds normal — and then it just stops. Locks up. Shows you that number. Error 8.
Most people's first instinct is to Google it, find a forum post from 2019 saying "just clean the brew group," do exactly that, and then watch the error reappear, much like how others struggle when their Home Assistant Green Won't Boot? How to Fix Power and Startup Issues after a simple power cycle. That's not a coincidence. That's the machine telling you something different from what most quick-fix guides acknowledge.
Error 8 on the Jura E8 is a brew group positional fault. The machine's internal logic monitors the brew group motor's rotational feedback — it expects the piston to travel to specific positions during the brew cycle. When it can't confirm those positions, it throws Error 8 and halts. The trigger can be mechanical (physical obstruction, seized gear), electrical (failed encoder wheel, broken motor winding), or firmware-adjacent (corrupt position memory after power cycling during a brew cycle). All three look identical from the outside. That's what makes this repair genuinely annoying.
What Error 8 Actually Means Inside the Jura E8 Motor Architecture
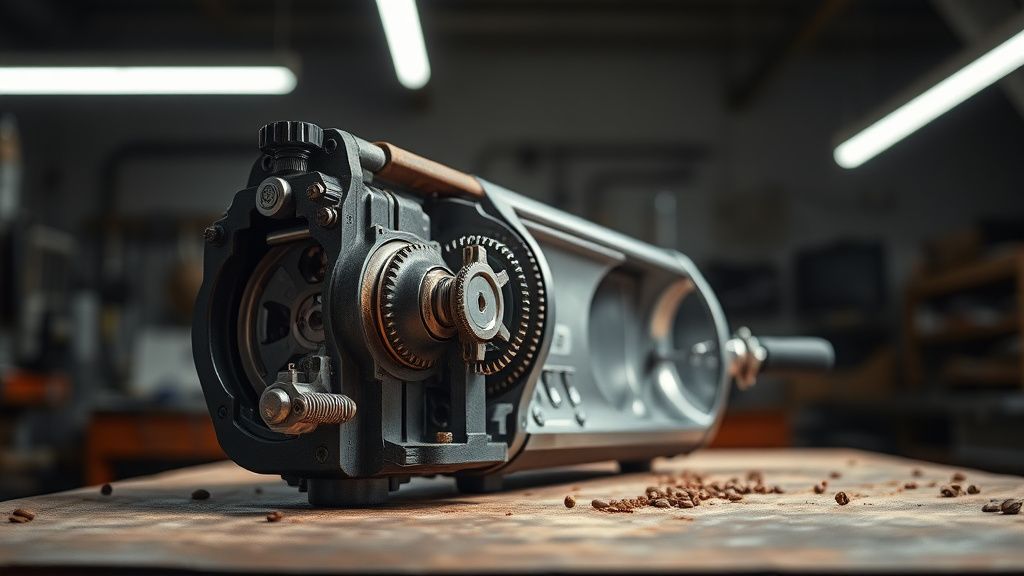
The Jura E8 uses a centralized brew group drive system. A DC motor — typically positioned behind the front panel, coupled to a gear reduction assembly — drives the internal brew group piston through a defined range of motion. Position is monitored by an encoder wheel: a small disc with evenly spaced holes or reflective segments mounted on the motor shaft, read by an IR sensor on the PCB.
During every brew cycle, the firmware counts encoder pulses to determine whether the piston has traveled the expected distance. If pulse count diverges from the expected value — either too few (motor struggling or seized) or none at all (encoder dead or motor dead) — the firmware aborts the cycle and flags Error 8.
This is a deliberately conservative design decision. Jura's engineering team built in positional monitoring specifically to prevent the motor from burning itself out by grinding against a seized mechanism indefinitely. From an engineering standpoint, it's sensible. From a user standpoint, it means the machine will refuse to operate even when the underlying problem is a small wad of coffee grounds jammed in the wrong place.
What the error code does not tell you is which of the four or five possible causes is actually responsible. The onboard diagnostic system doesn't have that granularity in its error reporting for end users. You get Error 8. That's it. No subcategory, no component code, no stack trace. Which means diagnosis has to happen manually, layer by layer.
The Four Primary Failure Modes Behind Error 8
1. Coffee ground or oil buildup in the brew group piston travel path
This is the most common cause. The E8's brew group is designed to be removable and cleanable, but a lot of users clean the group itself without cleaning the internal chamber that the group sits inside. Dried coffee oil on the internal cylinder walls creates enough friction to stall the motor mid-cycle. The motor isn't dead. It's just overloaded.
2. Worn or cracked drive gear in the transmission assembly
The gear train between the motor and the brew group piston is a stack of nylon and acetal gears, a mechanical complexity comparable to the precision needed for a Roomba i7 Error 31: How to Fix Docking Station Communication Failures diagnostic. These have a finite service life — typically somewhere around 20,000 to 30,000 brew cycles under normal operating conditions, though that number drops dramatically if the machine has been running with a partially seized brew group for an extended period. Worn gear teeth slip. Cracked gear bodies skip entirely. Both generate incorrect encoder pulse counts.
3. Encoder wheel failure
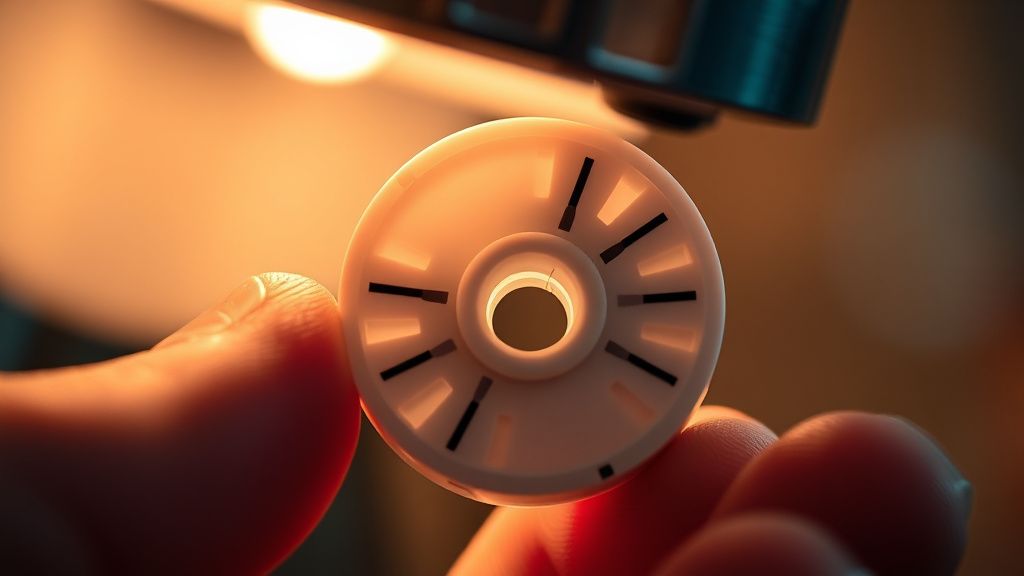
The encoder wheel itself can fail in a few ways. The disc can crack from thermal stress (the motor runs warm). The IR sensor can accumulate coffee particulate on its optical surface, reducing signal clarity. The sensor's solder joints can develop micro-cracks from vibration. In any of these cases, the PCB stops receiving reliable position feedback and Error 8 follows.
4. Motor winding failure or brush wear (less common)
This typically shows up in older machines or units that have run through heavy commercial use. The motor's internal resistance changes, it draws higher current, and the PCB's overcurrent protection triggers a shutdown that also manifests as Error 8. This is relatively uncommon in the E8 specifically under household use, but it happens.
Field Reports: What Actually Comes In for Error 8
I've seen a lot of these. Let me walk through what the actual case distribution looks like in practice.
The majority of Error 8 cases that come through a workshop are solved at the cleaning stage — but not by the method most users attempt. Removing the brew group, rinsing it under water, and reinserting it is not sufficient. The critical step most guides skip is cleaning the internal brew group chamber inside the machine body. You need to remove the brew group, then use a long-handled brush (a baby bottle brush works well for this) to scrub the inner cylinder walls. Then rinse with warm water from a squeeze bottle, drain thoroughly, and let it air dry before reinserting.
In roughly a third of cases I've seen, that's genuinely all it takes. The motor was fine. The encoder was fine. The gear train was fine. There was just enough friction from accumulated oils to push the motor past its stall detection threshold.
The next most common scenario: a cracked or chipped gear tooth in the transmission. This is disproportionately common in machines that have been running with the coffee strength setting maxed out, or that have been grinding dark roasts with fine settings. The increased brewing resistance puts more load on the drive train over time. When you crack open the front panel on these units, you often find a gear that looks fine at a glance but has one or two teeth that are either missing or deformed. One missing tooth per revolution means one missed encoder pulse per cycle — and the firmware's tolerance for pulse count error is not generous.
Gear replacement on the E8 is a moderate-complexity job. You need to open the front and top panels, disconnect the brew group motor connector, unbolt the motor mounting bracket, and then carefully disassemble the gear stack. Jura's service parts availability for the E8 gear components is inconsistent. There are third-party gear replacement kits available through European parts suppliers — some of which are actually fine quality, some of which are garbage. The ones cast from low-quality nylon will last maybe 6 months before you're back at the same problem. If you're sourcing parts, look for gears machined from POM (polyoxymethylene / Delrin) rather than generic nylon. They're more dimensionally stable under heat and load.
The encoder wheel failures are the most frustrating to diagnose because they're intermittent. A partially cracked encoder disc might generate correct pulse counts 19 out of 20 brew cycles and then slip on cycle 20. The machine will throw Error 8 occasionally, work fine for a week, then fail again. Users on the Home-Barista forums and r/JuraCoffee have documented this pattern extensively — there are long threads where people describe their machine as "randomly throwing Error 8" that almost always turn out to be encoder disc issues once someone convinces them to actually inspect the disc under magnification.
One thread on Reddit from a user who identified themselves as a former Jura service technician described using a smartphone macro lens attachment to photograph the encoder disc in-situ, which allowed them to spot the crack without fully disassembling the motor assembly. That's a legitimate field technique. Worth knowing.
Counter-Criticism: The "Just Clean It" School vs. The "Replace the Motor" School
There's a real tension in online communities around how to approach Error 8. It breaks down roughly into two camps, and both of them are partially right and partially wrong in ways that are worth examining.
The "just clean it and it'll be fine" camp dominates YouTube repair videos and most forum quick-answer responses. The advice isn't wrong — cleaning does resolve a large number of Error 8 cases. The problem is that it's given without any diagnostic framework. Someone who's already cleaned their brew group three times and is still seeing Error 8 doesn't need to clean it again. They need to move down the diagnostic tree. But because the "clean it" advice is so overwhelmingly prevalent online, a lot of users spend weeks in a loop of cleaning cycles before anyone suggests they check the mechanical components.
The "replace the motor unit" camp shows up mainly in professional service contexts and tends to overcorrect in the other direction. Factory-trained technicians with flat-rate labor pricing often default to motor assembly replacement because it's faster and more billable than chasing down a cracked encoder wheel or a single worn gear. The motor assembly swap is also covered under Jura's service exchange program in some markets, which makes it administratively clean for authorized service centers. The problem is that a new motor assembly is expensive — depending on region and parts source, you're looking at a component that can cost more than the secondary market value of the machine itself. Recommending that as a first step rather than a last resort is bad advice for users.
The reality — which anyone who has done a meaningful number of these repairs understands — is that the correct approach is methodical: clean first, inspect gears second, check encoder third, replace motor only if all else fails. Most Error 8 cases don't reach step four.
Step-by-Step Repair Procedure for Jura E8 Error 8
This is not a rushed guide. Work slowly. The E8 uses a combination of T8 Torx, T10 Torx, and Phillips screws. There are also several hidden snap clips on the top and rear panels that will crack if you force them. Take your time.
Tools Required
- T8 Torx screwdriver
- T10 Torx screwdriver
- Phillips PH1 and PH2 screwdrivers
- Plastic spudger or case opening tool
- Small stiff-bristle cleaning brush
- Bottle brush (long handle)
- Food-safe lubricant (Molykote 111 compound or equivalent silicone grease)
- Isopropyl alcohol (90%+ concentration)
- Lint-free cloths
- Smartphone camera or magnifying glass for encoder inspection
Stage 1: Brew Group Cleaning (Do This Before Opening the Machine)
- Turn off the machine and remove the water tank and drip tray.
- Open the left side panel access door and remove the brew group by pressing the release button while turning the extraction handle.
- Rinse the brew group under warm running water. Do not use soap. Rotate the group through its full piston travel manually — it should move with reasonable smoothness. If it feels gritty or binds, that's a signal.
- With the brew group removed, look into the internal chamber. Use your bottle brush to scrub the cylinder walls.
- Flush the chamber with warm water from a squeeze bottle. Tip the machine slightly to drain.
- Allow everything to dry — ideally overnight. Coffee oil residue on a wet brew group can gum up within hours.
- Reinsert the brew group. Power on. Run a cleaning cycle. If Error 8 clears, you're done.
If Error 8 persists after a full dry, proceed to Stage 2.
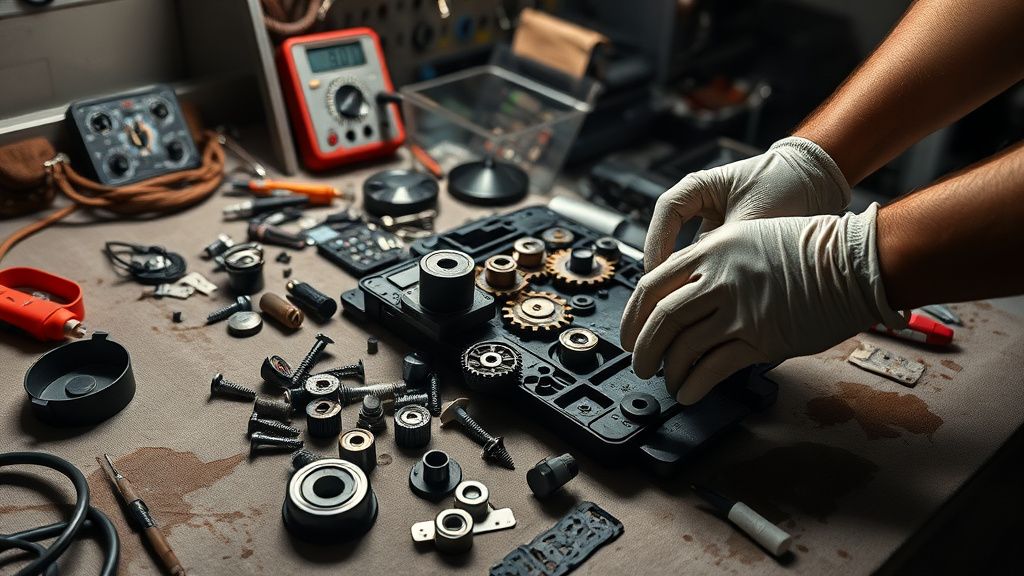
Stage 2: Front Panel Removal and Gear Train Inspection
- Power off. Unplug from mains.
- Remove the top panel: there are typically two T10 Torx screws recessed near the rear of the top surface, plus snap clips along the front edge. Pry gently with the spudger starting from the rear corners.
- Remove the front panel: two T8 Torx screws are typically hidden behind the side door trim. The panel also has snap clips along its lower edge.
- With the front panel off, you'll see the brew group motor assembly and gear stack. The motor itself is usually a small DC motor in a cylindrical housing, roughly the diameter of a 50-cent coin, mounted horizontally.
- Examine the visible gears. Look for missing teeth, cracks radiating from the gear center bore, or whitish stress marks on gear surfaces. Even slight deformation of a tooth is enough to cause Error 8.
- If a gear is damaged, note its position in the stack and its tooth count before ordering a replacement. Photographs at this stage are essential.
Stage 3: Encoder Wheel Inspection
- With the motor assembly accessible, locate the encoder wheel on the motor shaft — it's typically at the non-output end of the motor, inside a small optical sensor bracket.
- Using your smartphone camera with flash enabled, photograph the encoder disc face-on at high magnification.
- Look for: hairline cracks across the disc, deformation or warping, and significant accumulation of fine coffee dust on the optical sensor face.
- If the sensor face is fouled with particulate, clean it gently with a cotton swab dampened with isopropyl alcohol. Allow to dry completely.
- If the disc is cracked, replacement is required.
Stage 4: Encoder sensor cleaning and motor terminal check
Before condemning the motor itself, test resistance across the motor terminals with a multimeter. A healthy motor will show a low but consistent DC resistance — typically in the range of a few ohms for a motor of this size, though this can vary. What you're looking for is an open circuit (infinite resistance) or wildly inconsistent readings, which indicate a failed winding or worn brushes.
Note: Specific resistance values are not published by Jura in their public-facing documentation. Comparison measurement against a known-good donor motor is the most reliable approach if you have access to one. Without a reference unit, open circuit = failed. Any consistent low resistance reading = likely okay.
Stage 5: Reassembly and Function Test
- Apply a very thin coat of food-safe silicone lubricant to the brew group piston shaft and the internal cylinder sealing areas.
- Do not over-lubricate. Excess grease migrates into the brewing path.
- Reassemble in reverse order.
- Before running a brew cycle, manually cycle the brew group through its full range of motion with the group installed but the machine powered off. It should travel smoothly.
- Power on. Run a rinse cycle first. If no error, run a brew cycle with coffee.
The Economic Reality: Repair vs. Replace
Here's where things get uncomfortable. The Jura E8 is a mid-to-high-end machine — it retails in a range that justifies meaningful repair investment. But the economics shift quickly depending on parts availability and labor.
If you're doing this yourself, the cost of parts (a gear kit, possibly an encoder disc) is manageable. If you're paying a service technician, flat-rate diagnosis plus labor plus parts can reach a number that makes buyers on secondary markets uncomfortable. Especially since a "refurbished" E8 on eBay or a similar platform might be trading at a price that makes a repair bill look disproportionate.
Jura has authorized service centers in most major markets, and their standard approach for Error 8 often defaults to brew group motor assembly exchange. That's clean, fast, and definitively solves the problem — but it's not the most cost-effective path for a machine that has a cracked encoder disc.
The machine's actual mechanical lifespan, maintained correctly, is well beyond most users' expectations. These aren't cheap components — they're just wearing ones. The core pump, boiler, and grinder assembly on an E8 can run for a decade or more under household use. Error 8 is genuinely a mid-life maintenance issue, not a death sentence for the machine.
That said: if your machine is out of warranty, you've already cleaned the brew group multiple times, you've found a cracked gear and a fouled encoder, and the nearest service center is quoting you a repair bill approaching half the machine's replacement cost — that's a real calculation that has a different answer depending on your attachment to the unit and your willingness to do the work yourself.
The honest position is: Error 8, caught early and diagnosed correctly, is usually a fixable problem at reasonable cost. Error 8 that's been ignored while the machine has been forcibly restarted repeatedly in hopes it'll resolve itself — that's where you sometimes find a motor that has genuinely burned its windings from repeated stall events. The machine's protective firmware is trying to prevent exactly that outcome. When people override it by cutting power and