
Quick Answer: Your Home Assistant Green won't boot? Nine times out of ten it's a bad power supply, corrupted eMMC storage, or a botched OTA update, similar to the issues users face when fixing a Ring Doorbell 4 stuck in a firmware loop. Start by swapping the official USB-C power adapter (5V/3A minimum, not your phone charger), check the LED status sequence, and if you see a solid red or no LED at all, you're looking at a hardware-level problem that goes deeper than a simple reflash.
There's a particular kind of silence that tells you something is wrong before you've even touched a device. You walk past your Home Assistant Green sitting on the shelf — that little olive-green box that was supposed to be the "just works" answer to the DIY smart home chaos — and the LED is either dead, stuck on red, or doing some bizarre amber-flash pattern you've never seen before. The app won't connect. The dashboard is gone. Automations that controlled your lights, your thermostat, your door locks — all of it, offline.
And your first instinct is usually the wrong one. Most people immediately start reflashing, factory resetting, or worse, opening the device and poking around before they've properly diagnosed what is actually broken. That costs time. Sometimes it costs data. Occasionally it turns a recoverable situation into an actual brick.
Let me walk you through this properly.
Understanding the Home Assistant Green Hardware Architecture: eMMC, Power Rail, and Boot Sequence
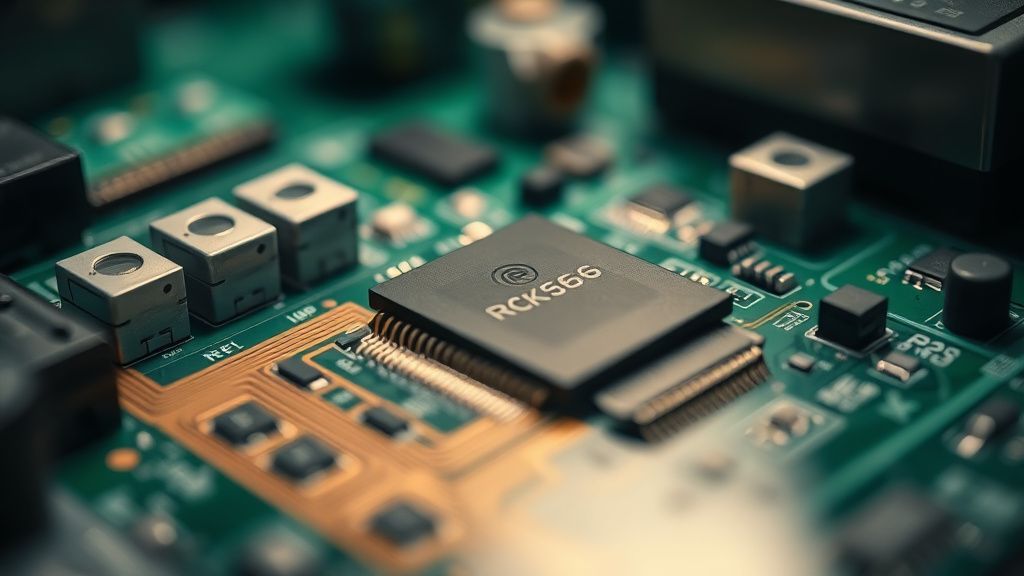
Before you start pressing buttons or downloading images, you need to understand what you're actually working with. The Home Assistant Green is not a Raspberry Pi clone with a microSD card you can yank out and reflash on another machine. It runs on a Rockchip RK3566 SoC (the same class of chip you'll find in mid-range Android TV boxes) with 32GB of onboard eMMC flash storage. That eMMC is soldered directly to the PCB.
This matters enormously for troubleshooting, because:
- The boot chain is tied to the eMMC, not a removable card. If the eMMC has bad sectors in the bootloader region, the device cannot recover itself.
- The RK3566 has its own Mask ROM layer — a hardcoded factory recovery mode that activates via USB before the OS even tries to load.
- Power quality is non-negotiable. The RK3566's power management IC (PMIC) is sensitive to voltage drops during boot. A 5V/2A charger from a junk drawer will sometimes boot the device and sometimes not, depending on ambient temperature, USB cable resistance, and what peripherals are attached. That intermittency will drive you insane if you don't know it's happening.
The LED indicator on the front panel is driven by the OS, unlike the specific hardware display errors you might troubleshoot when your Samsung QLED keeps flickering. This means: if the LED is completely dark, the SoC either isn't booting at all, or it's crashing before the OS can initialize GPIO pins. A blinking or partially lit LED tells you at least something loaded.
LED Status Codes: What the Home Assistant Green Is Actually Telling You
Nabu Casa — the company behind Home Assistant — documents a simplified version of the LED behavior. What they don't fully explain is the edge case behavior you'll encounter when things go genuinely wrong.
Here's what you're likely seeing and what it actually means:
| LED State | What It Usually Means |
|---|---|
| Solid Red (startup) | Normal — waiting for OS to load |
| Solid Red (persistent, >2 min) | Boot failure — OS not loading |
| Pulsing Yellow/Amber | First-time setup, provisioning mode |
| Pulsing Blue | OS loaded, Home Assistant starting |
| Solid Blue | System running normally |
| No LED at all | Power failure, PMIC issue, or pre-boot crash |
| Rapid Red Flash | Hardware fault, sometimes thermal |
| Alternating Red/Blue | Bootloader-level recovery attempt |
The problem is that "persistent solid red" and "no LED" look similar from across a room, much like how users confuse intermittent device glitches when dealing with a Breville Barista Pro flashing drop icon. The diagnostic steps diverge immediately based on this distinction.
Step 1: Power Supply — The Problem Nobody Wants to Admit Is the Problem
I've been in people's homes. I've seen what they use to power these devices. A fraying USB-C cable. A 65W GaN laptop charger that was "probably fine." A USB hub with its own power adapter feeding four devices simultaneously.
The Home Assistant Green requires a clean, stable 5V/3A supply. That's 15 watts. The official Nabu Casa power adapter is rated for exactly this and is designed to maintain voltage under load. Generic USB-C chargers — including many that claim 3A capability — often have poor low-voltage regulation and will sag under load, particularly during the peak current draw that occurs during boot when the SoC, eMMC, and RAM are all initializing simultaneously.
Field observation: The device will frequently appear to boot, the LED will start its sequence, and then die somewhere mid-sequence, cycling back to solid red. This is not a software problem. This is a brown-out restart loop caused by the PMIC detecting under-voltage and triggering a reset. It happens because the RK3566's power-on sequence has multiple discrete power rail enable events, and if the 5V rail sags during any one of them, the PMIC cuts the sequence and tries again.
What to Actually Do:
- Use the official USB-C power adapter that shipped with the device. If you don't have it, a quality 5V/3A USB-C charger from a reputable brand (Anker, AUKEY, or similar with verified regulation specs) is the second option.
- Use a short, thick USB-C cable. Cable resistance matters. A 2-meter thin cable at 3A will drop measurable voltage. Use the shortest cable that's practical, ideally the one that came with the adapter.
- Power the Green directly from the wall. Not through a USB hub. Not through a smart plug that might have a startup delay or relay click voltage spike.
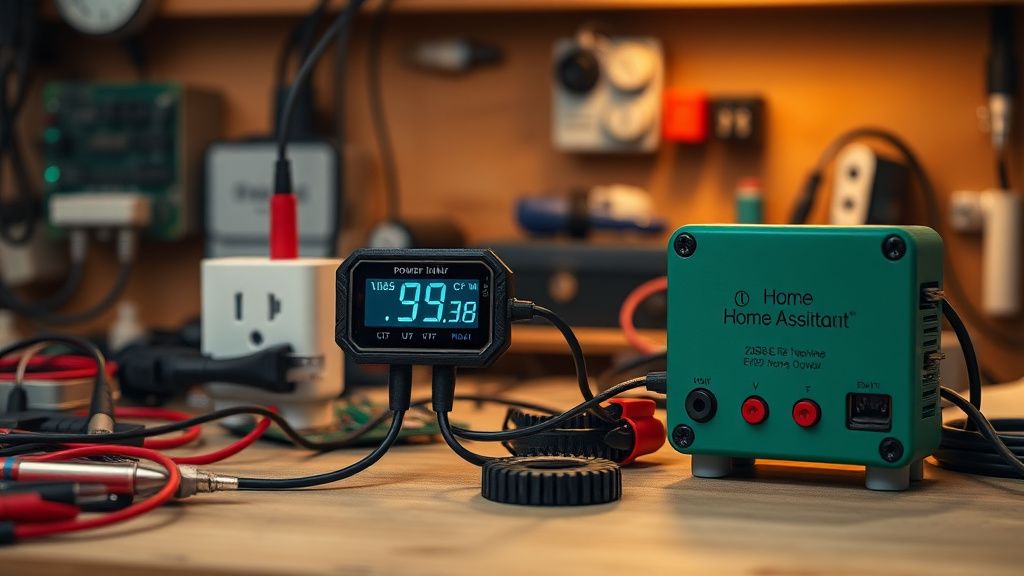
- Test with a USB voltage/current meter if you have one (like a Ruideng UM25C). You're looking for stable 5.0-5.1V at boot. If you're seeing 4.7V or lower under load, that's your problem.
- Disconnect all USB accessories during boot. Even a low-power USB Zigbee stick draws current that the marginal power supply can't spare.
"I spent three days thinking my unit was bricked after a HA update. Turned out my 'official Apple 20W charger' was dropping to 4.6V on the 5V rail when the Green was booting. Swapped to the original power brick, booted first try." — r/homeassistant thread, commonly recurring sentiment
Step 2: Isolate the Cause — Software vs. Hardware Boot Failure
Once you've confirmed the power supply is legitimate, you need to figure out where the boot is failing. This is where most home users get stuck because they don't have debug tooling.
What You Can Check Without Opening the Device
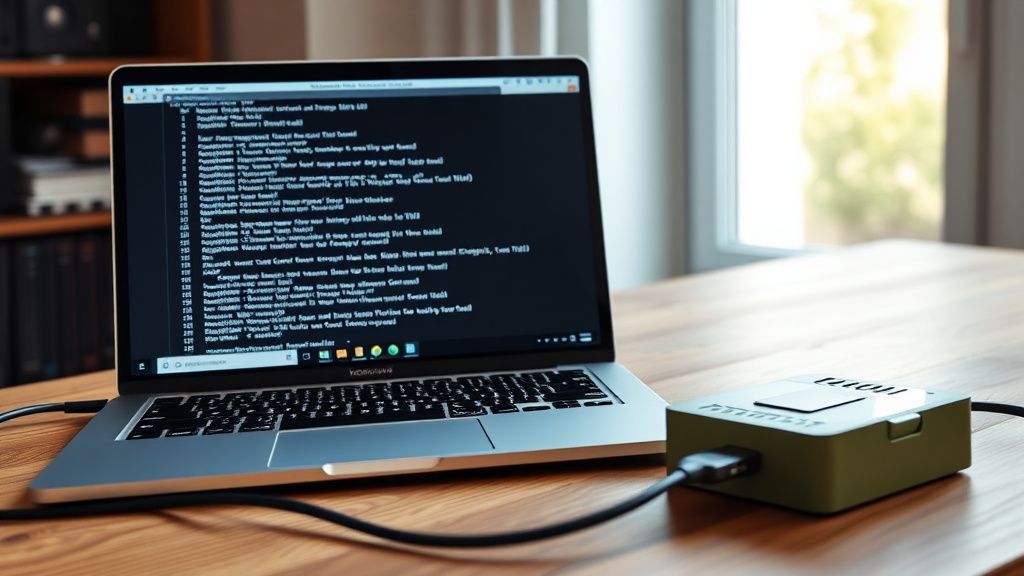
Connect via USB-C to a computer. When the Home Assistant Green boots, it identifies itself on the USB bus. If it's in normal operation, you won't see much — it's not designed to be a USB device in normal mode. But if it's in Rockchip Maskrom mode (pre-bootloader recovery), Windows Device Manager or lsusb on Linux will show it as "LOADER Device" or "Rockchip In-Mask-ROM mode."
This is actually useful diagnostic information. If your device shows up in Maskrom mode without you doing anything special, it means the bootloader on the eMMC is corrupted or missing.
Connect to a monitor via HDMI. The Home Assistant Green has an HDMI port. During normal boot, you won't see much — HA Green is not designed to use a display in production — but during recovery or boot failure, the RK3566 may output bootloader messages or error text. Connect to a monitor before powering on and watch what appears in the first 10 seconds. Even a brief flash of text gives you diagnostic information.
Check your router's DHCP table. If the device is partially booting (getting into the Linux kernel but failing before HA services start), it may still request a DHCP lease. Its hostname will appear as homeassistant in most router DHCP logs. If you see it in the DHCP table but can't reach the web UI, the issue is at the application layer, not hardware.
Step 3: The OTA Update That Broke Everything — Partial Flash Recovery
This is the scenario that fills the Home Assistant community forums every time there's a significant OS release. Home Assistant OS updates write to the eMMC in stages. If power is interrupted mid-write — by a brief power outage, by someone unplugging the device, or by a power supply brownout exactly at the wrong moment — the result is a partially written image with a corrupted bootloader partition, a corrupted root filesystem, or both.
The symptoms are distinctive:
- The device was working fine, you initiated an update from the UI or it updated automatically overnight
- In the morning, the LED is stuck in a pattern it wasn't in before
- The web UI is unreachable
- Maybe you can ping the IP address, maybe you can't
Recovery Path for OTA-Corrupted Systems
Nabu Casa provides a USB recovery mechanism for exactly this scenario, though the documentation is written with the assumption that you already know what Maskrom mode is, which many users don't.
Here's what actually works:
Download the Home Assistant OS image for the Home Assistant Green specifically (
haos_green-[version].img.xz) from the official GitHub releases atgithub.com/home-assistant/operating-system/releases. Do not use a generic Raspberry Pi image. Do not use the generic x86 image.Download rkdeveloptool — this is Rockchip's official command-line flashing utility. On Linux it's available through most package managers. On Windows, you'll need the Rockchip DriverAssist and RKDevTool GUI instead. On macOS, you're building from source.
Put the device in Maskrom mode: Hold the reset button (small recessed button on the back of the Green) while plugging in the USB-C cable to your computer. The device should appear as a Rockchip USB device within 2-3 seconds. If it doesn't appear, try a different USB port (USB 2.0 ports are sometimes more reliable for Maskrom detection than USB 3.x ports — this is a known quirk in Rockchip tooling).
Flash the full image using rkdeveloptool's
writecommand targeting the correct partition layout. This will wipe your data. Your configuration, automations, integrations, and history are gone unless you have a backup.
The backup situation is a whole separate problem. Home Assistant's built-in backup system requires you to have configured it before something went wrong. Users who never set up automatic backups to a network share or cloud destination lose everything. This is a systemic UX failure that the community has complained about since the early HA OS days. The onboarding flow does mention backups but does not enforce them.
Step 4: Hardware-Level Failures — When It's Not Software
After you've verified power and attempted software recovery, and the device still won't boot, you're looking at hardware. This happens less often than software failures, but it does happen.
eMMC Failure
The 32GB eMMC in the Home Assistant Green is industrial-grade by home appliance standards, but it's not immortal. eMMC flash has a finite write cycle endurance. More relevantly, eMMC chips can fail suddenly due to:
- Power interruptions during write operations (causes metadata corruption that sometimes can't be recovered by reflashing)
- Physical shock (unlikely in a fixed installation, but if the device was dropped)
- Thermal stress over time (the RK3566 runs warm; sustained high ambient temperatures accelerate flash degradation)
- Manufacturing defects (early batches of any consumer hardware have a statistical failure rate)
How do you know it's the eMMC rather than a software issue? If rkdeveloptool cannot see the eMMC device at all when in Maskrom mode — or reports errors during flash that aren't USB-related — the eMMC itself may be the failure point. At this point, recovery without physical component replacement is not possible for most home users.
USB-C Port Physical Damage
The USB-C port on the Home Assistant Green is the power input and the recovery interface simultaneously. Damaged port contacts — from inserting cables at an angle repeatedly, or from electrical events on poorly grounded setups — can cause intermittent power delivery that looks exactly like a power supply problem but isn't.
Test: Try multiple different USB-C cables from multiple angles. If the device occasionally powers on when you adjust the cable but not otherwise, the port has damaged contacts.
The Thermal Throttle Loop Nobody Talks About
The RK3566 will throttle and eventually shut down if thermal management fails. The Home Assistant Green has passive cooling — a heatspreader in contact with the chassis. If the device is installed in an enclosed space with poor airflow (inside a media cabinet, inside a junction box — yes, people do this), sustained operation can cause thermal issues that manifest as random reboots or boot failures under load.
This doesn't show up in simple boot tests done on a workbench with the device in open air. It only appears in the deployment environment. Check the thermal installation conditions if the device fails consistently in location but boots fine when moved.
Step 5: Factory Reset vs. Full Reflash — Understanding the Difference
There's persistent confusion in the community about what "factory reset" actually does on the Home Assistant Green versus a full image reflash.
Factory Reset (initiated through the HA UI or physical button sequence): Wipes the /data partition where your configuration lives, but preserves the OS partition. If your OS is corrupted, a factory reset will not fix it. It will still fail to boot.
Full Reflash (via rkdeveloptool in Maskrom mode): Writes a complete new OS image to the eMMC, including bootloader, boot partition, root filesystem, and data partition. This is the nuclear option. Everything is gone and you start from scratch.
The distinction matters because users frequently attempt factory resets on systems with corrupted bootloaders, wonder why it didn't help, and then assume their hardware is dead when it isn't.
Real Field Reports: What Actually Breaks, Who It Breaks For
Let me give you the honest operational picture from watching community threads over several years of Home Assistant Green being in the market.
Pattern 1: The First-Time Installer With a Leftover Charger Most common scenario. Person buys a Green, their official power adapter gets lost during shipping or they set it aside to "use a better one." Device works for days or weeks, then fails to boot after a power cycle. Everything points to software. It's actually the charger.
Pattern 2: The Update-During-Power-Outage User Lives in an area with occasional brief power interruptions. No UPS on the network closet. Green updates at 3am, power blinks at 3:02am. Wakes up to a brick. Recoverable with reflash, but loses configuration data.
Pattern 3: The Overclocker Who Installed Too Many Add-Ons Runs 15+ add-ons simultaneously on a 32GB eMMC device. Filesystem fills up. HAOS writes fail silently. Over time, critical system files get partially written. Device becomes unreliable, eventually fails to boot. This is a scaling problem the hardware spec doesn't really warn you about.
Pattern 4: The "It Just Stopped Working" User Two years of flawless operation, device just stops booting one day. Usually eMMC wear or a bad sector appearing in a critical location. Reflash works but requires addressing the underlying configuration recovery problem.
Counter-Criticism and the Ongoing Debate: Is the Home Assistant Green Actually Reliable Hardware?
This is where the conversation in the HA community gets uncomfortable.
The Home Assistant Green was marketed as the "plug and play" solution for people who didn't want to mess with Raspberry Pi image flashing and SD card corruption. The selling point was reliability and simplicity. But the recovery process for a corrupted Green requires downloading command-line Rockchip tools and manually flashing eMMC in Maskrom mode — which is significantly more technical than the Raspberry Pi recovery process of just writing a new