Error 4 on your Ecovacs Deebot T9 indicates a mechanical obstruction of the main brush assembly. This typically stems from entangled debris (hair, carpet fibers, or cords) or a seized brush motor bearing. To resolve, remove the main brush, clear all obstructions, verify the motor drive shaft, and ensure the brush cover is properly seated.
Problem Nedir (What is the Problem?)
Error 4 is the internal system flag generated by the Deebot T9’s firmware when the Hall Effect sensors or the Current Sense shunt on the main board detects an anomalous load on the brush motor. In layman's terms, the robot’s computer is "feeling" that the brush is pushing back with too much resistance. It interprets this as a physical jam—a "stuck" state—to protect the motor from burning out due to thermal runaway or electrical overcurrent. When this happens, the robot halts operation, enters a standby safety state, and triggers an audible alert or app notification to prevent permanent damage to the drivetrain.
Belirtileri (Symptoms)
The most obvious symptom is a hard stop during a cleaning cycle. Your Deebot will likely:
- Emit an audible "Error 4" voice prompt.
- Display a blinking red light on the primary LED indicator.
- Send a push notification to the Ecovacs Home app stating: "Main brush is tangled. Please clean it."
- In some cases, you may hear a high-pitched mechanical whine or a rhythmic clicking noise coming from the underside before the unit shuts down.
- The brush itself may appear stationary even when the unit is in "cleaning" mode.

Olası Nedenler (Possible Causes)
- Mechanical Obstruction: The most common culprit is hair or fiber entanglement that physically locks the brush roller.
- Worn Bearings: Over time, the side bearings of the main brush assembly accumulate dust and debris, increasing the coefficient of friction until the motor can no longer spin the brush efficiently.
- Debris in the Drive Socket: Small pebbles or debris can fall into the drive gear socket, preventing the brush from seating correctly.
- Motor Failure: While rare, the main brush motor (a DC brushless motor) may develop internal shorts or have degraded magnets, causing it to draw excessive current.
- Mainboard Current Sense Calibration: In some instances, a firmware bug or a drifting shunt resistor on the main PCB can cause the unit to report a false positive for an obstruction, similar to how a Ring Doorbell Pro might experience connectivity issues after a Wi-Fi change, as detailed in this guide on Ring Doorbell Pro offline troubleshooting.
Quick Fixes (Hızlı Çözümler)
- The Power Cycle: Turn off the master power switch, remove the robot from the dock, and let it sit for 30 seconds to drain residual charge from the capacitors.
- Manual Clearing: Flip the unit over, release the brush cover latches, and pull the main brush out. Use a specialized brush-cleaning tool (or a seam ripper/scissors) to clear any hair wrapping around the ends of the roller.
- Bearing Inspection: Check the two floating plastic bearings at the ends of the roller. They should spin freely. If they are gritty, rinse them with high-percentage isopropyl alcohol and clear away dust.
- Reseat Everything: Ensure the brush is properly oriented in the drive socket (one side is square/hex-shaped, one is round) and that the brush cover clicks firmly into place. A loose cover can trigger the safety sensor.
Advanced Fixes (Ileri Düzey Çözümler)
When quick fixes don't work, you must look deeper into the mechanical and electrical health of the unit, much like an appliance technician exploring the profitable smart fridge repair niche.
Step 1: Inspect the Drive Socket. Sometimes, the square drive socket on the motor side becomes warped or packed with compacted dust. Use a pick tool to clean this area. If the plastic drive head is stripped, the motor will spin, but the brush won't—this requires a replacement of the brush motor module, which is a specialized task comparable to troubleshooting why a Ring Doorbell blinks white due to power transformer issues.
Step 2: Checking the Motor Voltage. Using a multimeter, you can check if the mainboard is sending power to the brush motor. Disassemble the bottom chassis (requires removing the side wheels and the battery cover). Look for the two-pin connector powering the brush motor. If the unit is active and you see 0V under load, your mainboard's power transistor (MOSFET) controlling the brush is likely blown.
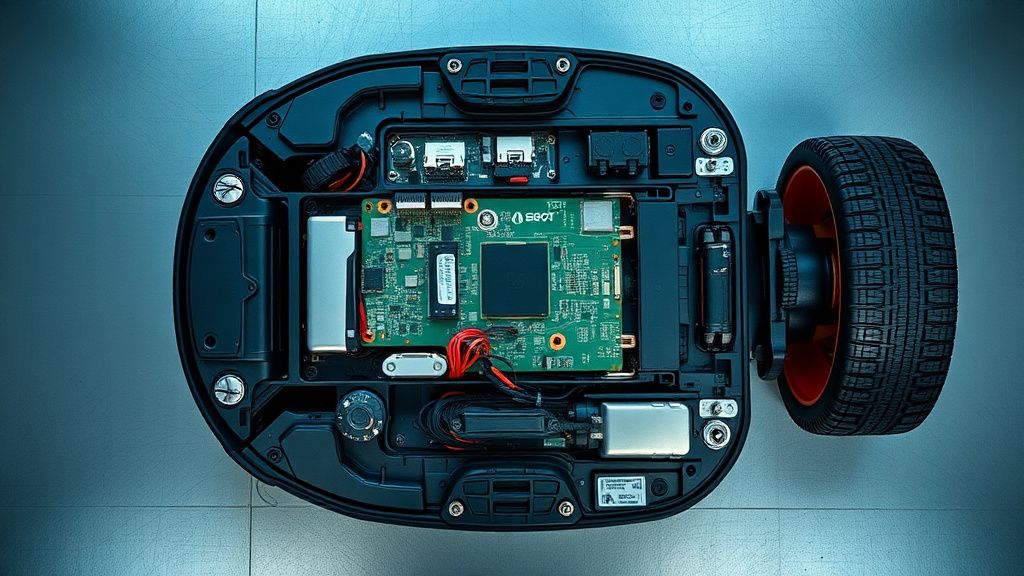
Step 3: Gearbox Maintenance. The Deebot uses a planetary gear system to reduce speed and increase torque. If you hear a grinding noise, the plastic teeth inside the gearbox have likely stripped. This part is a consumable and can be purchased as a third-party replacement for a few dollars. Replacing this is essentially a "side hustle" bread-and-butter task.
Factory Reset (Fabrika Ayarlarına Döndürme)
If you suspect a software glitch is triggering false Error 4 reports, perform a hard factory reset:
- Open the top cover of the Deebot T9.
- Locate the small Reset button near the Wi-Fi LED.
- Use a paperclip to hold the Reset button down for approximately 10–15 seconds while the robot is powered on.
- The robot will announce that it is restoring factory settings. Note: This will wipe your map history and custom cleaning schedules.
When to Replace (Ne Zaman Yenisiyle Değiştirilmeli?)
As a technician, I recommend retiring a Deebot T9 under the following conditions:
- Liquid Damage (Corrosion): If the motherboard shows signs of oxidation or white/green powdery crust, it is a ticking time bomb. Attempting to repair PCB corrosion is often a waste of time as traces continue to fail months later.
- Mainboard Component Failure: If the processor itself (the MCU) has failed, or if the board requires professional micro-soldering that exceeds 50% of the unit's current resale value, it is time to upgrade.
- Frame Damage: If the robot has been dropped or crushed and the chassis is misaligned, the gear alignment will never be perfect, leading to recurring "Error" messages regardless of repairs.
Real Field Reports (Gerçek Saha Raporları)
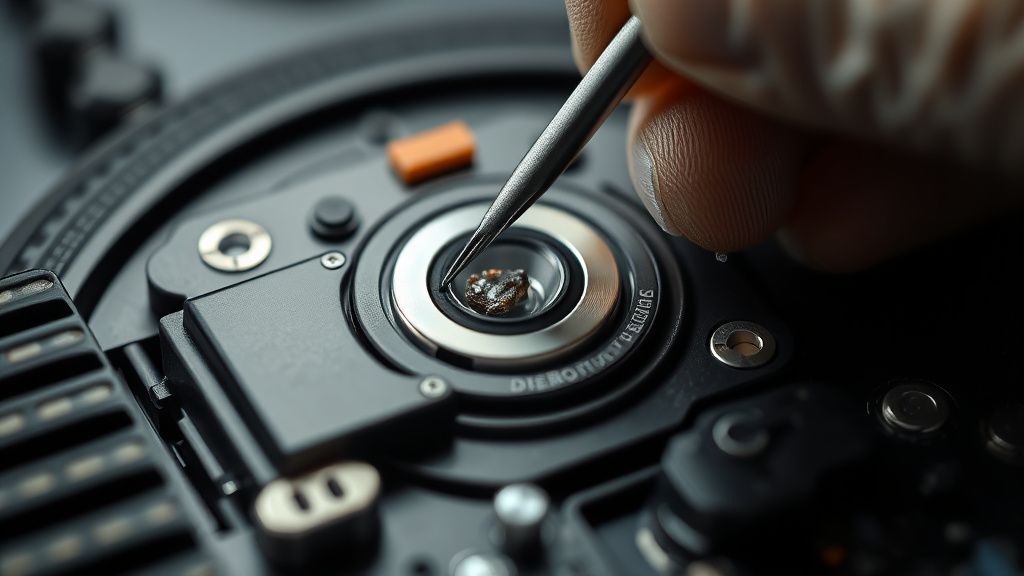
During my tenure as an appliance repair contractor, I encountered a "cluster" of Error 4 cases in households with long-haired pets. One specific client had an E9 model (similar architecture to the T9) that persisted in Error 4 despite three brush motor replacements. Upon closer inspection, I discovered a metal staple had wedged itself into the brush motor’s hall sensor magnet gap, causing magnetic interference that fooled the board into thinking the motor was locked. This highlights the importance of using a flashlight and magnifying lens—don't just assume the part is dead; look for the "ghost in the machine."
Counter-Criticism/Debate (Karşılıklı Eleştiri)
There is a significant debate in the repair community regarding "aftermarket" replacement parts. Some technicians argue that cheap third-party brush motors from online marketplaces have higher failure rates and poorly calibrated RPM sensors compared to OEM Ecovacs parts. While OEM parts are more expensive, they provide a higher "Mean Time Between Failures" (MTBF). If you are building a repair side hustle, be transparent with your customers: offer the "Budget Repair" (third-party) vs. the "Premium Repair" (OEM). The market is moving toward right-to-repair, but as professionals, we must balance longevity with customer budget constraints.
FAQ (Sıkça Sorulan Sorular)
Can I just bypass the Error 4 sensor?
Absolutely not. The sensor is there to prevent the motor from drawing enough current to melt the plastic housing or fry the mainboard traces. Bypassing it would be a significant fire hazard.
Why does my Deebot T9 keep reporting Error 4 even after cleaning?
If the brush is clean and the bearings turn freely, it is highly likely that your brush motor's internal hall sensor has drifted or the current shunt on the mainboard has developed a high-resistance contact point. Try a factory reset first; if that fails, the brush motor module is the next most probable failure point.
Is this error covered under warranty?
Usually, yes, provided there is no evidence of user neglect (like excessive hair buildup that hasn't been cleaned in months). If the motor failed due to electrical fault, Ecovacs support will often repair it for free within the warranty window. Check your local consumer laws regarding Warranty Rights.
Can I fix this without special tools?
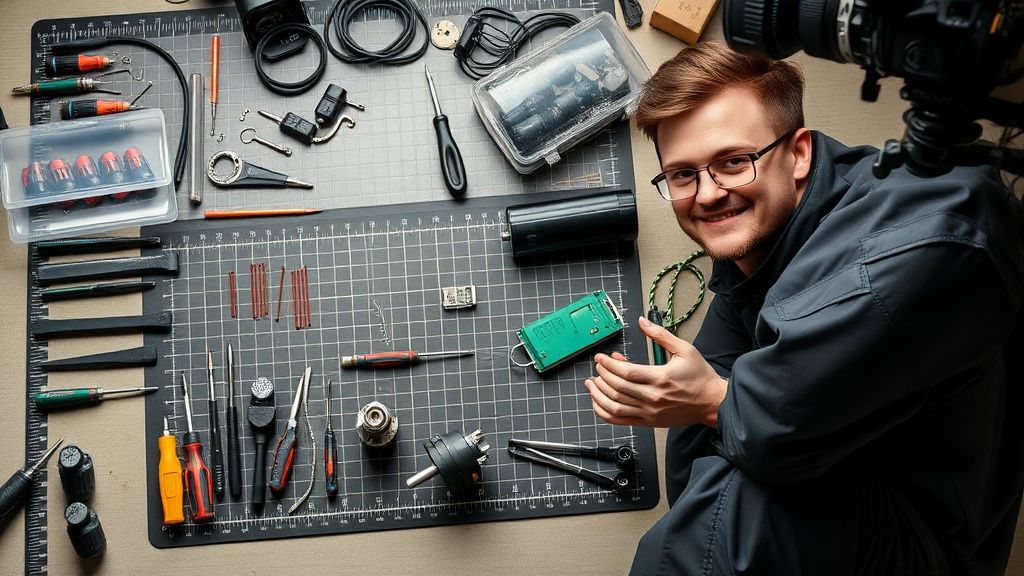
You can perform the basic cleaning steps with nothing more than a screwdriver and a pair of scissors. For internal repairs (replacing the motor or gear assembly), you will need a precision screwdriver set (Phillips #0 and #1) and basic electrical cleaning tools like contact cleaner.