Quick Answer: The Philips XXL Airfryer convection fan noise is almost always caused by one of four things — food debris lodged near the fan blade, a worn or misaligned fan bearing, loose internal components vibrating against the chassis, or a damaged fan motor. Clean the fan cavity thoroughly, check for loose parts, and inspect the bearing before assuming the motor is dead; similarly, if you have other appliances acting up, like a Keurig K-Supreme Won't Stop Flashing? How to Force a Successful Descale Cycle, troubleshooting steps are essential.
If you've owned a Philips XXL Airfryer for more than eighteen months and you're now getting that rattling, grinding, or high-pitched whine from the back of the unit, welcome to the club. This is one of the most-reported issues across every Philips Airfryer forum thread, Reddit community, and Amazon review section you can find. And the frustrating part? It's almost never just one thing causing it. It's usually a cascade of small problems that compound each other over months of regular use — and Philips' official support channel is, frankly, not particularly helpful once you're past the warranty window.
I've torn down more of these units than I care to count at this point. The Philips HD9860, HD9650, and the newer XXL Combi variants all share a broadly similar internal architecture, much like how many modern kitchen gadgets suffer from specific, predictable errors—similar to a Jura E8 Error 8: How to Fix Your Espresso Machine’s Brew Group Stall. The noise pattern tells you a lot about what's actually broken before you even open the thing, much like diagnosing a Ninja Foodi Lid Error? How to Fix Persistent Sensor and PCB Faults by listening for specific cues.
Understanding What "Convection Fan Noise" Actually Means in the Philips XXL Platform
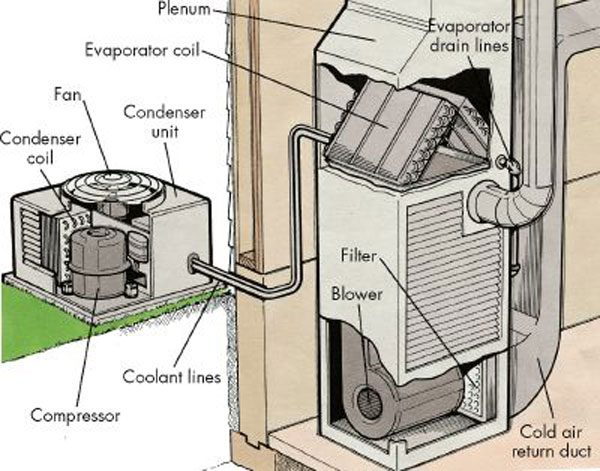
The Philips XXL uses a radial flow fan — sometimes called a centrifugal fan — rather than a simple axial blade. This matters because radial fans are inherently more sensitive to imbalance than axial designs. Even a small asymmetric deposit of grease or a minor deformation in one blade tip will create a wobble that amplifies at operating RPM.
The fan is mounted on the motor shaft which sits inside a housing that is heat-pressed into the upper cavity of the appliance. The design is compact and efficient, but creates servicing challenges, similar to how firmware glitches can turn a Ring Doorbell 4 Stuck in a Firmware Loop? Here’s How to Fix It into a complex repair job.
What Each Noise Type Is Actually Telling You
- Rattling or clicking — physical debris (usually bone fragment, seed, small piece of food) caught in the fan cavity or against the blade. Also possible: a loose fan shroud retaining clip.
- Grinding or scraping — bearing wear. The sleeve bearing inside the fan motor is dying. This is a time-limited failure. It will get worse.
- High-pitched whine increasing with temperature — thermal expansion causing a warped fan blade to contact the housing. Common after the unit has been dropped or handled roughly during transport.
- Low-frequency drone or hum — motor winding issue. Rare in units under three years old, but not impossible.
- Intermittent noise that resolves then returns — grease accumulation on the blade creating dynamic imbalance that shifts position as the appliance heats and cools.
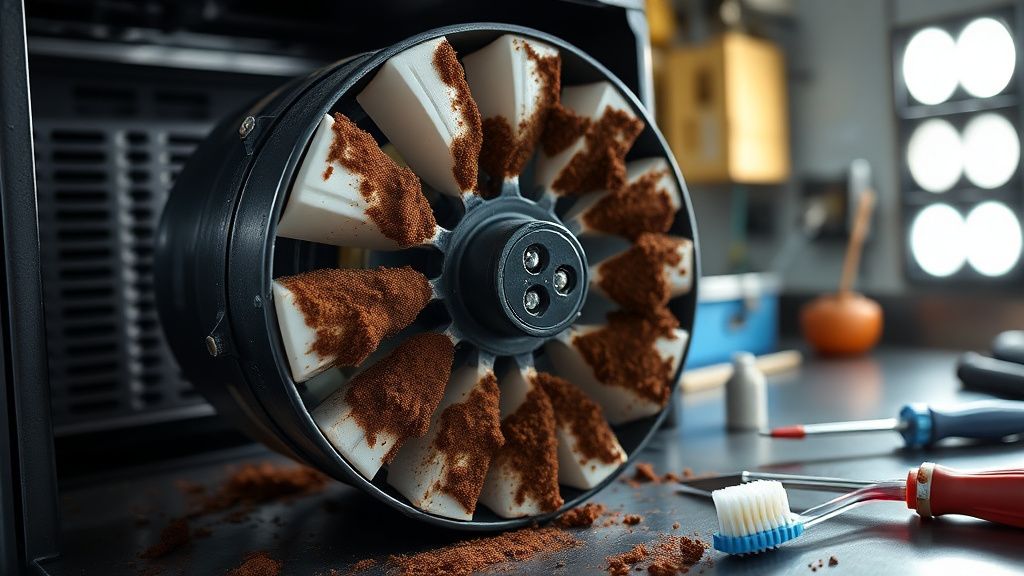
The last one is the sneaky one. People clean the basket, clean the drawer, occasionally wipe the heating element — but almost nobody cleans the fan blade until the noise starts. By then you've often got a 2–3mm buildup of carbonized grease on the blades, a persistent maintenance issue similar to fixing an Xbox Series X Stuck on Green Screen? Here Is How to Fix It.
Real Field Reports: What Users Are Actually Experiencing
Across various consumer forums, complaint patterns are consistent, just as users often search for guides on a Sony Bravia XR Black Screen: Is It a Software Glitch or Hardware Failure? or a Shark Ion Robot Error 7: How to Fix Wheel Obstruction Issues for Good. A thread on r/airfryer from late 2023 (title: "Philips XXL making horrible grinding noise after 2 years — warranty just expired, of course") accumulated over 300 comments. The dominant experiences break down roughly like this:
The majority of users report the noise starting gradually — a faint tick at first, then escalating over two to four weeks. Several users mention that Philips customer support told them the unit needed to be sent in for inspection, then quoted repair costs that were roughly 60–70% of the cost of a new unit. That's not a repair recommendation. That's a replacement recommendation dressed in polite language.
A smaller but significant group report the noise appearing suddenly after a specific cook — usually something with seeds (sesame, cumin whole, poppy) or small bone-in cuts. The seed scenario is particularly brutal because sesame seeds are small enough to pass through the basket perforations and reach the fan cavity.
One user on the Philips Community forum (post: "HD9860 fan vibration after 14 months") documented the entire teardown process with photos. The culprit in their case: a single poppy seed jammed between the fan blade and the housing. One seed. Causing a grinding vibration audible from across a room.
That is the operational reality of this platform. The gap tolerances between the fan blade and shroud are tight enough to do the job thermally but not tight enough to exclude very small particles that make it through the basket.
The Teardown Reality: Getting Inside a Philips XXL
This is where the documentation problem becomes obvious. Philips does not publish service manuals for most of their Airfryer line. There are no official exploded diagrams for the HD9860 or HD9650 series available on their public-facing technical documentation portal. The iFixit community has partial teardown guides for older models, but coverage for the current XXL generation is incomplete as of this writing.
What the community has pieced together through dozens of independent teardowns:
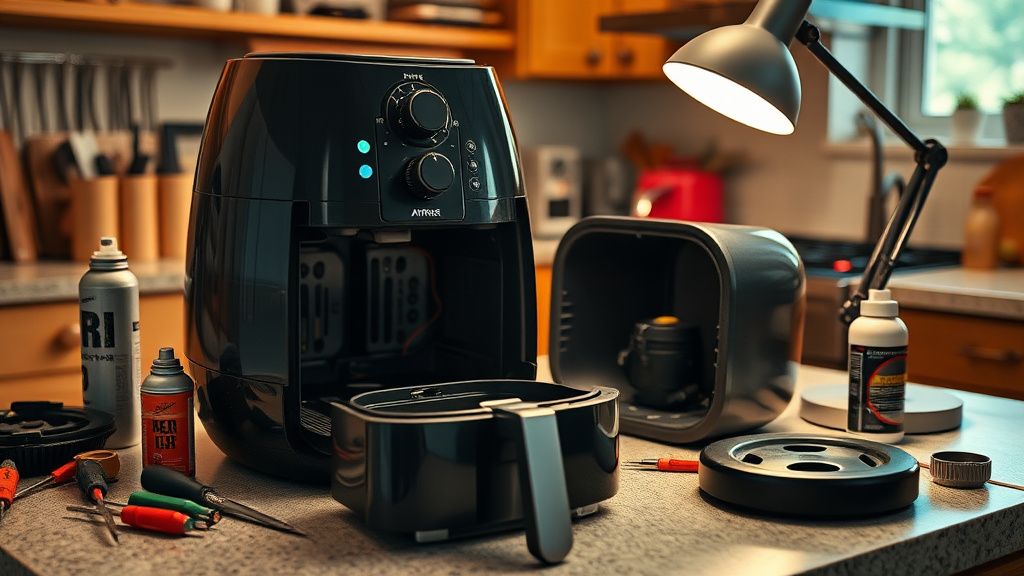
Tools You Actually Need
- T10 and T15 Torx screwdrivers (not Phillips — the irony of needing non-Philips heads to open a Philips appliance is not lost on anyone who's done this)
- T8 Torx for the internal motor mount on some variants
- Plastic pry tool or old credit card for the outer shell clips
- Compressed air canister
- Soft-bristle brush (old toothbrush works)
- Degreaser safe for plastics (isopropyl alcohol works, avoid acetone near plastic housings)
- Non-contact thermometer (optional but useful for post-repair verification)
The Disassembly Sequence That Actually Works
The outer shell is held by a combination of visible Torx screws and hidden friction clips along the top seam. Most people crack the housing because they find the screws, remove them, then try to force the shell — and the hidden clips shear. Take your time on the seam.
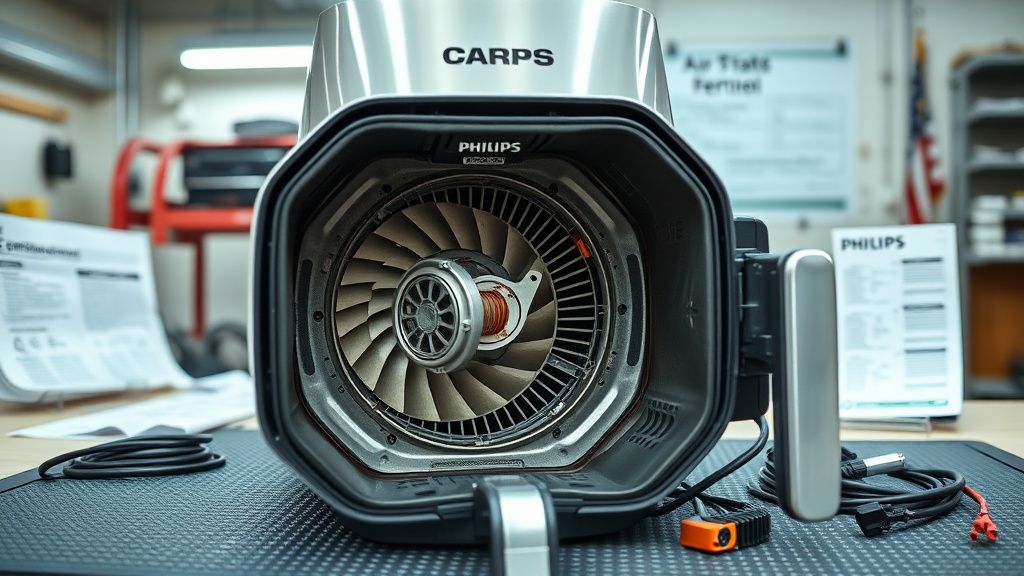
Once inside, the fan motor assembly is secured to the upper cavity by three or four mounting screws (varies by production batch — there are at least two different mounting configurations observed across units, which suggests Philips was still iterating the design during early production runs). The motor leads connect via a two-pin push connector that is slightly recessed and requires needle-nose pliers to release cleanly.
Critical safety note: The capacitor on the motor board can hold a charge after disconnect. Wait at least five minutes after unplugging before touching the motor assembly. This is not theoretical. The cap on these units is small but real.
The Actual Fix Sequence: Stop Guessing, Start Here
Most online guides jump straight to "replace the fan motor." That is almost never necessary and definitely not where you should start. Here is the proper diagnostic-first sequence that avoids unnecessary parts cost:
Step 1: The Carbon Deposit Clean
Before anything else. Remove the basket drawer and heating element per Philips' cleaning guide. Get a clear visual line to the fan blade. Use compressed air to dislodge loose debris. Then use a soft brush dampened with isopropyl alcohol to scrub the blade surfaces. You're looking for:
- Grease buildup on blade trailing edges (changes blade aerodynamic profile, creates turbulence noise)
- Hard carbonized deposits at blade roots near the hub (creates imbalance)
- Any foreign object anywhere in the cavity
This step alone resolves the issue for a substantial portion of users. No teardown required. No parts. Just cleaning.
Step 2: Fan Blade Visual Inspection
After cleaning, manually rotate the fan blade slowly with the unit unplugged. You are feeling for:
- Resistance or roughness in the rotation — bearing wear
- Any lateral play in the shaft — bearing failure progressing to structural
- Uneven rotation (catches at a specific point) — possible contact with housing at that position
- Visible blade deformation — warping or chip damage from impact
If rotation feels smooth and there's no lateral play, the bearing is probably fine for now. If there's roughness, you need to decide whether to regrease (short-term fix) or replace the motor assembly (long-term fix).
Step 3: Bearing Regreasing (The Underrated Fix)
The sleeve bearing in the Philips XXL fan motor is oil-lubricated from the factory. After high-cycle use in a high-temperature environment, this lubricant degrades. The bearing doesn't fail catastrophically — it dries out and creates friction noise first.
Accessing the bearing requires removing the motor from its mount (full teardown) and carefully removing the motor end cap. You're looking for a felt wick or oil reservoir around the shaft. Adding a small amount of high-temperature bearing oil (not WD-40, not general-purpose grease — proper oil for sleeve bearings, rated at least 150°C) can restore quiet operation.
This is not a permanent fix. The bearing is still worn. But it can extend useful life by months, which matters if you're waiting for a replacement motor or evaluating whether the machine is worth repairing at all.
Step 4: Fan Blade Rebalancing
If the bearing is fine but there's still noise, the fan blade itself may be dynamically unbalanced after cleaning — especially if cleaning removed material unevenly. Professional shops use balancing equipment for this. At home, the practical approach is to ensure cleaning was uniform and check for any remaining deposits.
A fan blade that has been running unbalanced for months may have also caused micro-wear in the bearing that manifests as noise. The problems compound.
Step 5: Motor Assembly Replacement
If bearing regreasing doesn't resolve a grinding noise, or if the motor shows any sign of electrical fault (burning smell, intermittent operation, visible coil discoloration), replace the motor assembly.
Here is where Philips' parts ecosystem creates real friction. Official Philips replacement parts are available through some authorized service centers, but the online parts availability for XXL motor assemblies is inconsistent. Third-party suppliers on eBay and AliExpress carry units described as compatible — with wildly variable quality. Some community members have reported that third-party motors for the HD9860 run at slightly different RPM profiles, creating a new noise signature after installation. Not louder necessarily, but different enough to be noticeable.
The part number situation is also messy. Philips has used multiple motor suppliers across production runs of nominally the same model number. This means a motor sourced for an "HD9860" may or may not fit depending on which production batch your unit came from. The community workaround is to photograph the original motor's labeling before ordering and cross-reference against community-maintained lists on the Philips Airfryer enthusiast threads.
Counter-Criticism: The "Just Replace It" Camp vs. The Repair Community
There is genuine tension in the community between two camps here.
One side argues that the repair effort isn't worth it — the Philips XXL retails at price points where, after warranty expiry, the total cost of a competent repair (time, tools, replacement parts) approaches or exceeds the residual cost of the appliance versus a new purchase or a comparable competitor unit. This is a legitimate economic argument, particularly for users who don't already own the tools.
The other side — and this is where the sustainability and right-to-repair conversation enters — points out that the environmental cost of treating a large cooking appliance as disposable is significant. A Philips XXL isn't a single-use item. The materials, manufacturing energy, and logistics embedded in that unit are substantial. Throwing it away because the fan bearing dried out after two years of heavy use is, to put it bluntly, a waste.
The engineering compromise Philips made — a sealed, non-user-serviceable fan assembly with no provision for bearing relubrication, no accessible drain for grease management near the fan cavity, and no published service documentation — creates this situation. It's not unique to Philips. It's the appliance industry's standard operating posture. But the Philips XXL's reputation as a premium product makes the lack of service support feel more pointed.
There's also a warranty angle that generates recurring frustration. The EU two-year statutory warranty means European users have a longer coverage window than markets where the standard one-year applies. Several documented cases on European consumer forums show users successfully arguing that fan failure within 24 months constitutes a manufacturing defect under EU consumer rights law — even when Philips' initial response was to quote a paid repair.
Edge Cases That Make This More Complicated Than It Looks
The "Noise Returned After Cleaning" Problem
Some users clean the fan cavity, reassemble, report the noise is gone — then find it returns within two to four weeks. This is almost always incomplete cleaning: debris or grease that was loosened but not fully removed gets redistributed during reassembly and then works its way back into a problematic position during operation. Full degreasing of the fan cavity walls, not just the blade, matters here.
The Thermal Expansion Contact Issue
A smaller subset of units develop a noise that only occurs when the unit is at operating temperature — completely silent when cold, grinding or scraping when hot. This is thermal expansion causing the fan blade or motor shaft to contact the housing. It's dimensional: the clearances that exist at room temperature vanish at 200°C. Fixing this properly requires identifying exactly where contact is occurring (sometimes visible as a wear mark on the housing interior) and determining whether the cause is a warped blade, a slightly shifted motor mount, or an out-of-spec replacement motor.
Post-Update Firmware Issues on Smart Variants
The HD9870 and similar WiFi-connected XXL variants have an additional failure mode that's distinct from mechanical issues: fan speed regulation is partially managed by firmware. There are documented community reports (on the Philips Home appliance community board and cross-posted to r/homeautomation) of units running the fan at incorrect speeds after firmware updates, creating noise profiles that don't match any mechanical failure pattern. Rolling back or resetting the unit resolves this in some cases. This is the kind of edge case that makes diagnosing noise on the smart variants significantly more complicated — you need to rule out firmware behavior before assuming hardware failure.
Preventive Maintenance: What Actually Extends Fan Life
The sad reality is that most of the guidance in Philips' documentation focuses on basket and drawer cleaning and barely addresses the fan cavity. But the fan cavity is where the long-term failure risk lives.
Practical Maintenance That Makes a Real Difference
- Cook oil management: Foods with high free oil content (chicken thighs, bacon, fatty sausages) generate more oil vapor that reaches the fan cavity. Using a small amount of water in the drawer when cooking very fatty foods reduces vapor generation.
- Post-cook fan-only run: On units that allow it, running the fan without heat for 60–90 seconds after cooking cycles out some residual vapor before it condenses on the blade.
- Quarterly fan cavity inspection: You don't need to disassemble the unit. Remove the basket and heating element per the standard cleaning guide, use a flashlight to visually inspect the fan blade, and use compressed air to clear loose deposits. If you can see visible buildup, do the full cleaning described above.
- Avoid seed-heavy foods in the basket without a liner: If you're cooking sesame-crusted anything, use a parchment liner with appropriate perforations. The minor reduction in airflow is worth it versus a seed in the fan cavity.
The Bigger Picture: Serviceability as a Product Design Choice
What the Philips XXL fan noise problem really illuminates is the broader tension between product design optimization for manufacturing cost and consumer expectations of longevity for premium appliances.
The fan assembly in a well-serviced unit would last considerably longer than it does in typical use. The failure is accelerated by grease accumulation that is structurally inevitable given the design — the fan sits directly above the cooking cavity with no meaningful grease barrier. Philips knows this. The service interval guidance doesn't reflect it.
This isn't unique to Philips. Ninja, Cosori, and Breville airfryers have their own fan failure patterns and their own documentation gaps. But Philips' market positioning as the originator and premium player in this