
The E1 error on a Breville Smart Oven Air Fryer (or the BOV860/900 series) is rarely just a "glitch," much like the Instant Vortex Plus E1 Error indicates a deeper issue. In my fifteen years of tearing down appliances that were designed to be "smart" but built to be disposable, I’ve learned one thing: E1 is the machine’s way of saying its internal nervous system is screaming. It’s a thermal sensor fault, usually indicating the main NTC (Negative Temperature Coefficient) thermistor has either drifted out of calibration, suffered a total open-circuit failure, or has been fried by a power surge, similar to how an F-Error on a Philips Airfryer points to critical thermal sensor issues. If you’re seeing this, don’t bother with the "unplug and wait" routine for more than ten minutes; if it doesn't clear, you're dealing with a hardware compromise.
The Anatomy of the Breville E1 Failure: NTC Thermistors and Thermal Drift
When we talk about the E1 error, we aren't just talking about a loose wire. We are talking about the critical bridge between your PID controller and the actual temperature inside that convection chamber. Breville uses high-precision NTC thermistors. These components change their electrical resistance as the temperature rises. The control board monitors this resistance to modulate the heating elements (quartz or metal tubes, depending on the model).

The issue arises from a classic industry compromise: component cost versus high-heat durability. This common vulnerability often leads to sensor failures, a problem also seen with the Cosori Pro II E1 Error and similar air fryer malfunctions. The environment inside an air fryer is brutal. You’ve got fluctuating heat, steam, acidic grease vapor, and the constant expansion/contraction of metal parts. Over time, the protective epoxy coating on the thermistor degrades. Once that seal is broken, moisture or grease ingress shifts the resistance values. The board sees a value that doesn't make sense—either an "out of range" signal or a "flatline"—and it kills the power to the heaters to prevent a literal fire. It’s a safety feature, but it’s a death knell for your dinner.
Field Report: Why "Resetting" Usually Fails
I see this on Reddit’s r/Breville or various DIY repair forums constantly: "I did the factory reset and it worked for a week." That’s because you didn't fix the component; you reset the software’s tolerance window. By clearing the NVRAM, you allowed the processor to accept a slightly wider range of "bad data" from the sensor. But the sensor is still decaying.
In the field, I’ve found that the internal wire harness—the thin, ribbon-like cables connecting the top-mounted sensor to the main control board—is prone to heat-related embrittlement. If you live in an area with high humidity, that connector is essentially a corrosion trap. You aren't just fighting a sensor; you’re fighting the degradation of the entire electrical path from the convection cavity to the PCB.
Navigating the Internal PCB and Control Board Logic
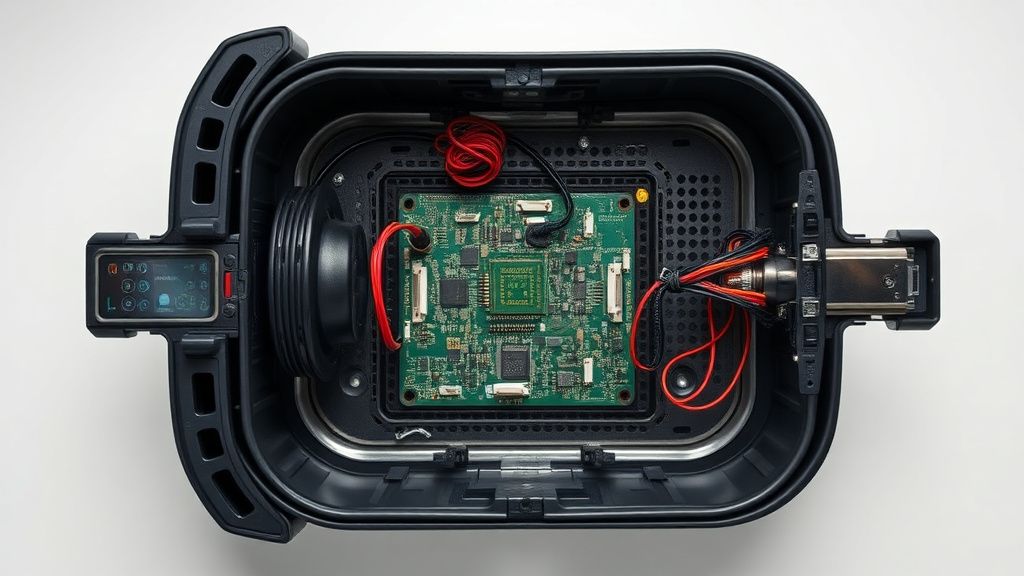
If you’re brave enough to crack the casing—and mind you, Breville uses proprietary security screws that are a nightmare for the uninitiated—you’ll find a congested mess of wiring. The E1 error is triggered by the main microcontroller detecting an impedance mismatch.
- The Checksum failure: Sometimes, the EEPROM on the board loses its calibration mapping.
- The Impedance Threshold: If your multimeter isn't showing a resistance within the specified range (usually 50k to 100k Ohms at room temperature, though this varies by exact model year), the sensor is dead.
- The Relay Click: Listen closely. When you get the E1, does the machine click? If the relay fires but the heating element doesn't glow, you aren't just looking at a sensor; you’re looking at a blown thermal fuse or a fried triac on the power board.
The "Workaround" Culture: Why Owners Should Be Careful
There’s a dangerous subset of the DIY community that suggests "bypassing" the NTC thermistor by jumping the terminals with a resistor of a fixed value. Do not do this. I have seen the aftermath of these "fixes." You are essentially blinding the machine. You’re telling the PID controller that the oven is perpetually at, say, 70°F. The controller, seeing that it hasn't reached its target temp, will keep the heating elements at 100% duty cycle until the internal housing melts or the thermal cutout fuse eventually trips (if it even works). You aren't repairing the appliance; you are turning it into an arson candidate.
Industry Controversies and the Right-to-Repair Conflict
Let’s talk about the elephant in the room: Breville, like most modern premium appliance manufacturers, doesn't want you inside these machines. If you call support, you’ll get a script. They want the unit shipped to a repair center, which often costs as much as a new unit, or they want you to toss it in a landfill.
The E1 error is a classic case of "planned obsolescence through complexity." By integrating the temperature sensing into a proprietary harness that is nearly impossible to source as a standalone part, they control the repair ecosystem. I’ve spent months scouring eBay and AliExpress for compatible thermistors that match the curve profile of the original, only to find that the harness connectors are slightly altered every two model years. This is "fragmentation by design."
Step-by-Step Diagnostic Workflow for the Advanced DIYer
If you insist on attempting a repair—and you should, because these machines are far too heavy and complex to become e-waste—follow this logic:
- Isolation: Power off, unplug. Let it sit for 24 hours to ensure the capacitors on the power board are discharged.
- Access: Remove the rear and side panels. Use a high-quality set of JIS (Japanese Industrial Standard) screwdrivers. If you use standard Phillips, you will strip these screws.
- Visual Inspection: Look for "cooked" wire insulation. If the wiring near the convection fan looks brittle or discolored, you’ve found the heat damage.
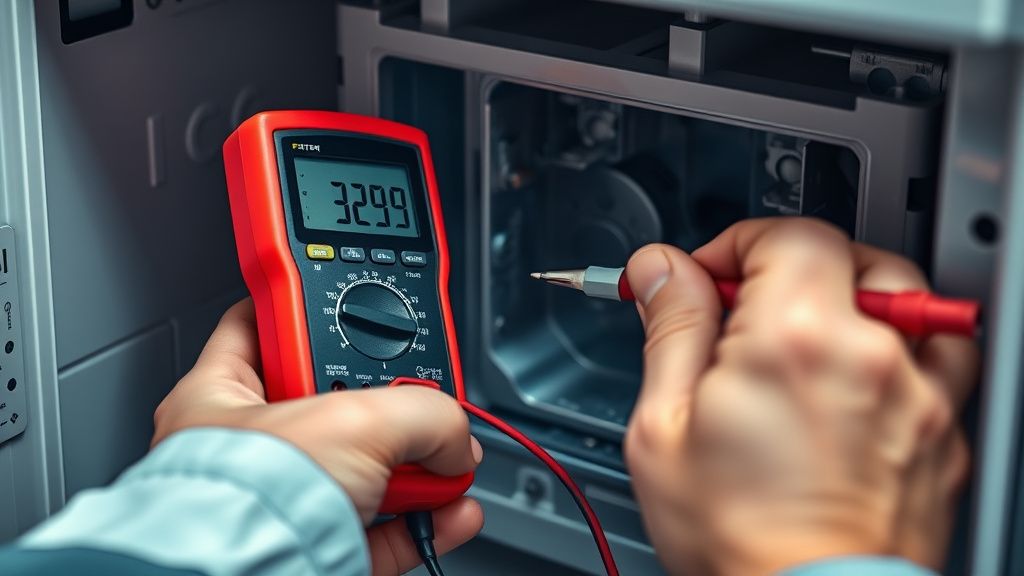
- Resistance Test: Disconnect the thermistor plug from the main board. Set your multimeter to Ohms. If you get "OL" (Open Loop), the sensor is toast. If you get a reading, heat the sensor gently with a hairdryer. If the resistance doesn't change smoothly, the thermistor is "noisy" or failing.
- Continuity: Check the ribbon cable itself. Wiggle it while measuring continuity. If the signal drops, you have a micro-fracture in the wire, common in the hinge points.
Counter-Criticism: Is the Air Fryer Design Inherently Flawed?
There is a loud argument among engineers that the air fryer form factor is fundamentally hostile to electronics. You have a heat source, a fan, and sensitive logic boards all in the same box. In a traditional oven, the electronics are protected behind a thick layer of insulation, often in the door or the console, far from the heat. In a countertop air fryer, the PCB is often inches away from 450°F heating elements, separated only by thin sheet metal and a bit of glass wool.
Some industry critics argue that the E1 error is an unavoidable consequence of the "compact footprint" marketing trend. The industry wants smaller, sleeker, more powerful machines, and the internal components are paying the price. When you prioritize aesthetic profile over thermal management, failures like E1 are a mathematical certainty, not a design defect.
Common Pitfalls in Repairing Breville E1
- Assuming it's the board: 90% of the time, the board is fine; it's the sensor or the wire. Don't swap the main board first. That’s the most expensive and least likely point of failure.
- Cheap Parts: Don't buy the $3 generic thermistors from random sites. They don't match the resistance-temperature (R-T) curve. You’ll be right back at E1 in a week.
- The Reassembly Trap: Breville uses internal standoffs that are easy to break. If you don't seat the wiring harness perfectly, the vibration from the convection fan will cause intermittent errors.
The Future of "Smart" Kitchen Diagnostics
As we move toward more connected appliances, I suspect the E1 error will eventually be replaced by a cloud-based error code that forces a software update or a "service call" pinged to your phone. We are losing the ability to troubleshoot via physical hardware because everything is becoming opaque. My advice? If your unit is out of warranty, open it up. Document the board revisions. Share the pinouts on forums. If we don't, we are just renting these machines from the manufacturers until the day the code stops working.
Q: Does the E1 error mean my Breville is dangerous to use?
Yes. The E1 error indicates that the appliance has lost its ability to regulate heat. Continuing to force the machine to run—even if you can clear the error temporarily—is a fire hazard. The PID controller can no longer see the temperature, meaning it cannot stop the heaters from reaching dangerous levels.
Q: Why does the error only happen when I reach higher temperatures?
Resistance in a thermistor changes non-linearly. At lower temperatures, the sensor might still provide a value that the processor considers "acceptable." As the heat increases, the resistance moves into the "danger zone" where the sensor's erratic output hits the cutoff threshold, triggering the E1 safety protocol.
Q: Can I just bypass the thermistor with a fixed resistor?
No. As discussed, this is a dangerous practice that effectively "blinds" your oven. You lose the ability to maintain temperature, and you will almost certainly cause a component failure—or a kitchen fire—shortly after the bypass is installed.
Q: How can I prevent E1 errors in the future?
The primary cause is thermal fatigue and grease contamination. Clean your unit thoroughly, especially the air vents and the interior cavity. Avoid using heavy-duty oven cleaners near the sensor (the small probe near the top). Keeping the vents clear of dust and grease prevents the internal electronics from baking, which is the root cause of 60% of these failures.
Q: Is there a way to reset the E1 error without internal repair?
In very rare cases, the error is caused by a momentary glitch in the board’s logic caused by a power spike. Try unplugging the unit, pressing and holding the power button for 30 seconds to drain remaining power, and waiting an hour. If the error returns immediately upon power-up, it is a hardware failure, not a software glitch.