Error 10 on the Roborock S7 MaxV is the system's way of signaling that the filter is clogged, airflow is restricted, or the fan motor has encountered a stall condition. In essence, your robot is literally "choking" on dust. By performing a deep clean of the filter and ensuring the air intake path is clear, you can resolve 95% of these cases within minutes. If the error persists, it usually points to a failing fan unit or a blocked internal ducting system, much like how you might need to repair a Shark RV1001AE Error 8 side brush motor if mechanical issues arise.
Problem Nedir (What is the Problem?)
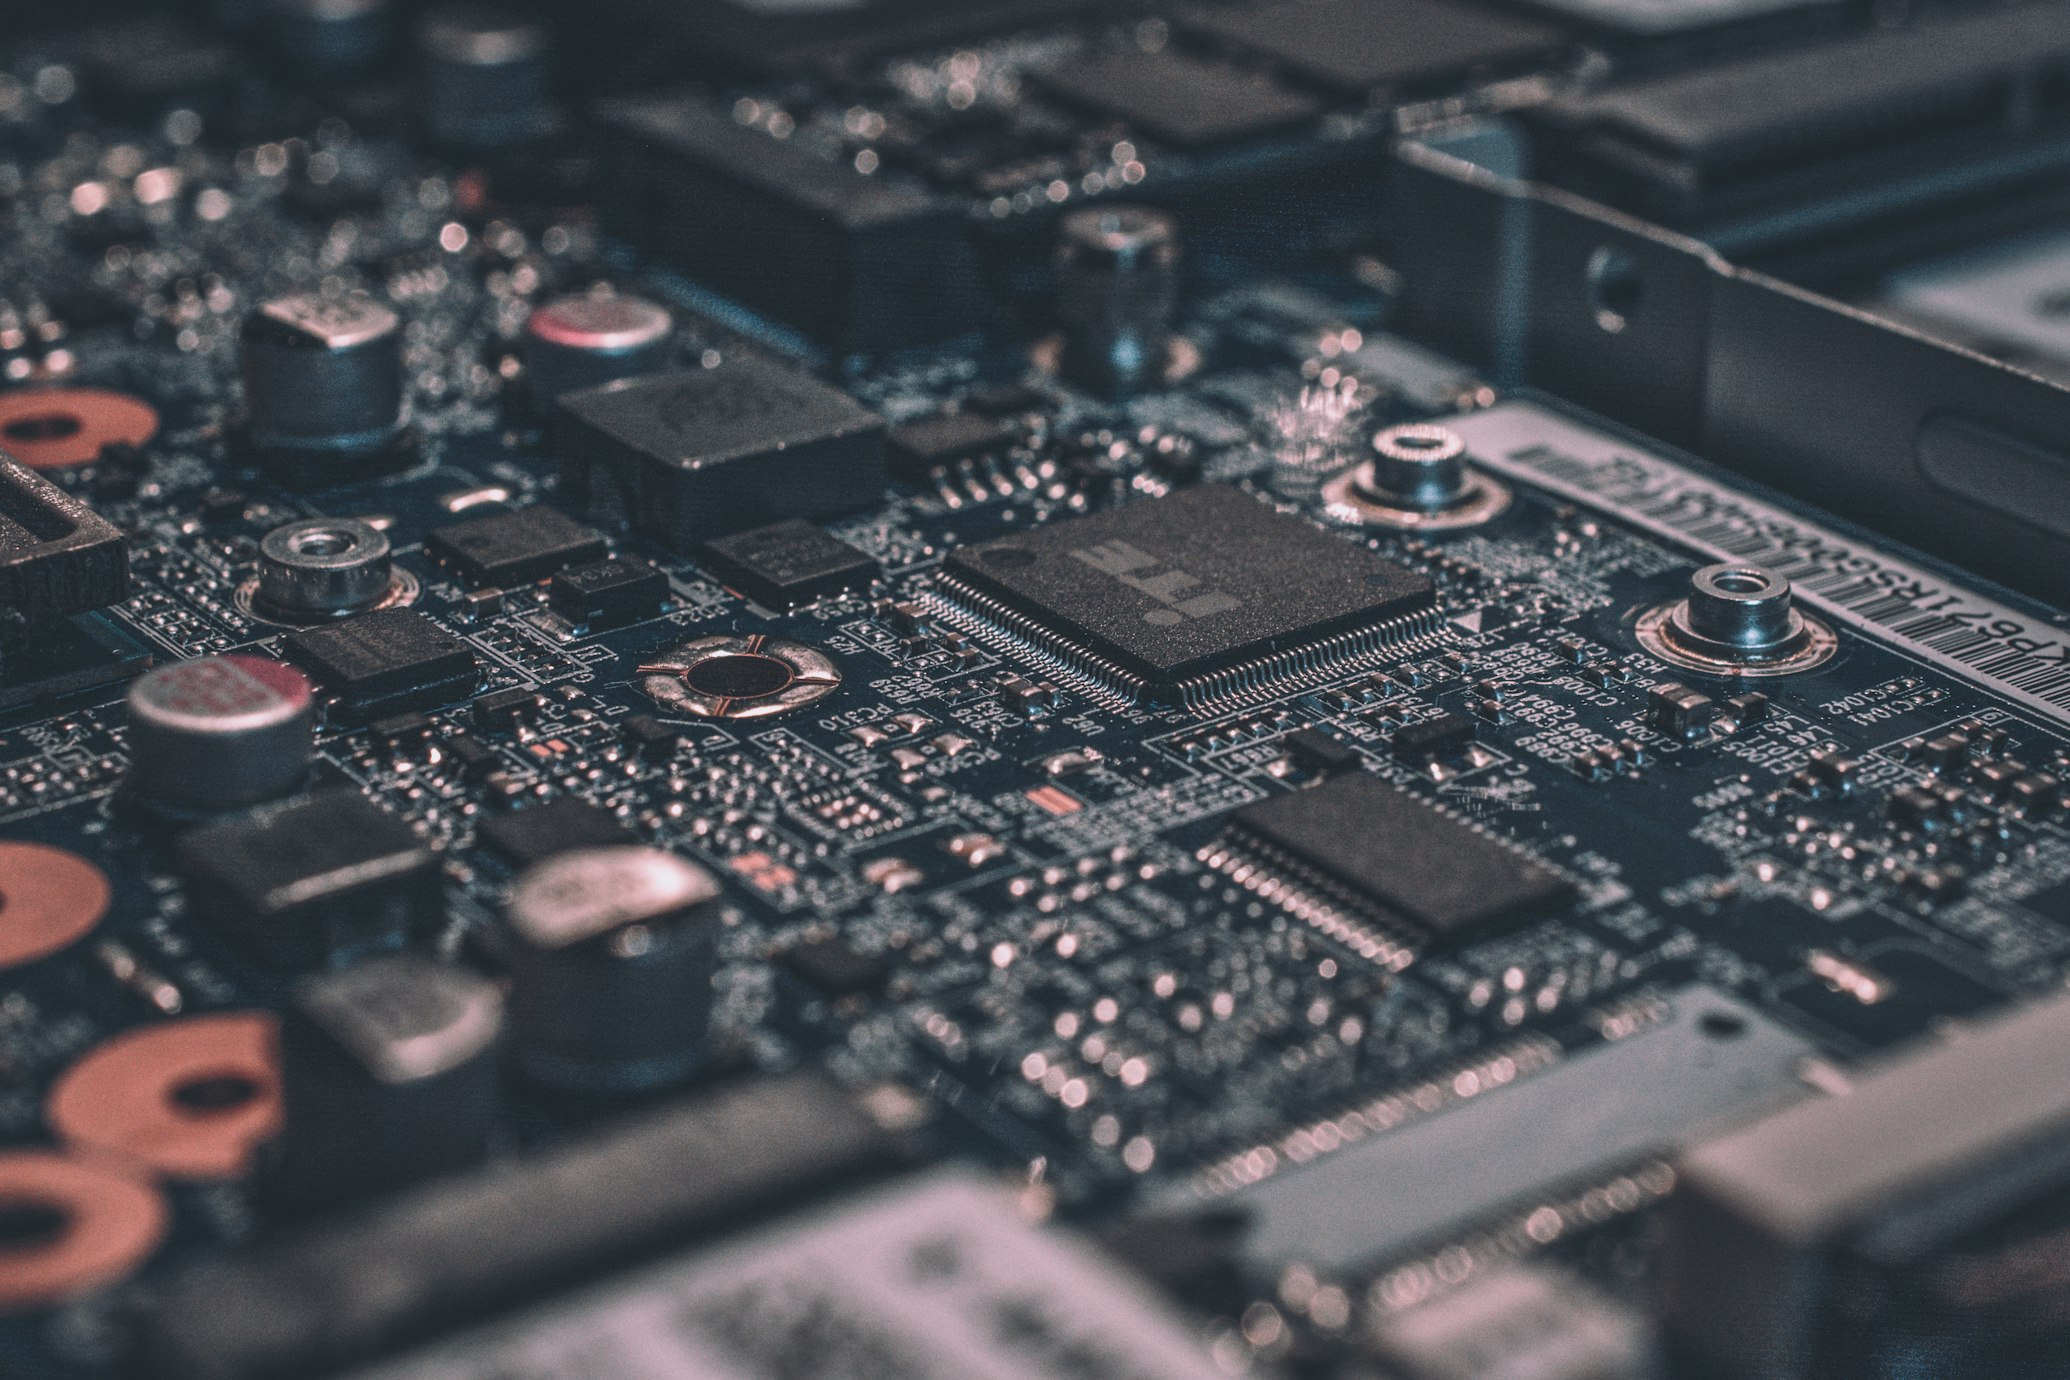
Error 10 in the Roborock S7 MaxV ecosystem is categorized as an "Airflow Obstruction" fault. Unlike simple sensor errors, Error 10 is mechanical and physical. The onboard microprocessor monitors the RPM (revolutions per minute) and the electrical draw (current/amperage) of the vacuum fan motor. When the fan experiences excessive load—typically caused by a vacuum pressure drop due to a clogged HEPA filter—or if the intake path is physically obstructed by debris like a toy, heavy carpet fibers, or a dense hairball, the firmware triggers an emergency shut-off to prevent the motor from burning out.
Think of it as the robot equivalent of a human trying to breathe through a tightly pinched straw. If the vacuum cannot pull air through the system, the motor spins inefficiently, creating heat and potential electrical strain on the motherboard’s power delivery circuit. The Error 10 code is a protective measure designed to ensure the longevity of the most expensive internal component of the vacuum: the DC blower motor.
Belirtileri (Symptoms)
When your S7 MaxV hits an Error 10, the behavioral patterns are very specific:
- Auditory Cues: You will notice a high-pitched, strained whine coming from the fan area right before the unit stops completely. In some cases, the fan might sound "thumpy," indicating a physical blockage in the impeller.
- Visual/App Indicators: The power button will pulse red, and the Roborock mobile application will send a push notification stating: "Error 10: Filter is clogged. Please check filter and airflow."
- Performance Drops: Prior to the error, you may have noticed the robot moving across the floor but failing to pick up larger debris or failing to transition to "Max" suction mode on carpets.
- Sudden Stalls: The robot stops mid-clean, often in the middle of a room, and refuses to continue until the error is cleared via the app or a manual restart.
Olası Nedenler (Possible Causes)
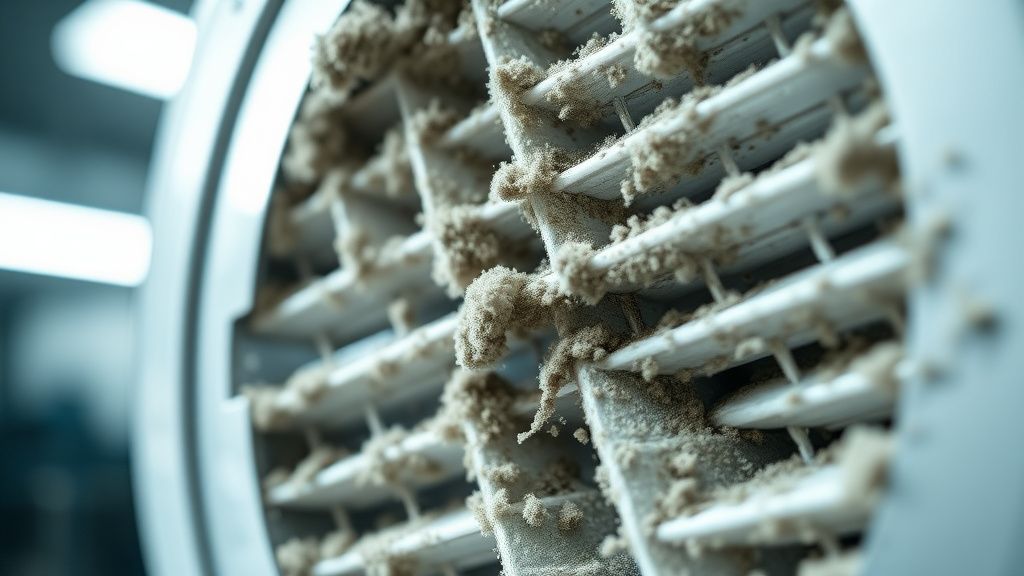
- HEPA Filter Saturation: This is the primary culprit. When the HEPA filter is clogged with fine dust, airflow stops. If the filter is damp or has been washed but not completely dried, the fibers expand, effectively sealing the filter and causing immediate airflow restriction.
- Obstruction in the Air Path: The intake channel between the brush roll housing and the dustbin can become blocked by large items (e.g., coins, socks, or thick carpet strings).
- Fan Impeller Debris: Small particles can sometimes bypass the filter and reach the fan impeller, causing it to become unbalanced or physically jammed.
- Sensor Calibration/Firmware Bug: In rare instances, the software miscalculates the pressure differential, flagging a functional filter as clogged, which is a common diagnostic challenge seen in appliances, similar to troubleshooting a Cosori 5.8qt Air Fryer E1 error.
- Motor Failure: The internal blower motor itself has a finite lifespan, and if you are dealing with other home appliance quirks, you might find guides like fixing a Ninja Foodi preheat sensor to be equally essential for your household maintenance. As the bearings wear out, the motor draws more current than the board expects, triggering a fault code.
Quick Fixes (Hızlı Çözümler)
Before you break out the screwdriver, attempt these steps to clear the fault:
- Filter Refresh: Remove the dustbin, take out the HEPA filter, and tap it firmly against a trash can to dislodge fine particles. If it looks grey/brown, use a soft-bristled brush to clear the pleats. Crucial: Ensure the filter is 100% bone-dry if you decide to wash it.
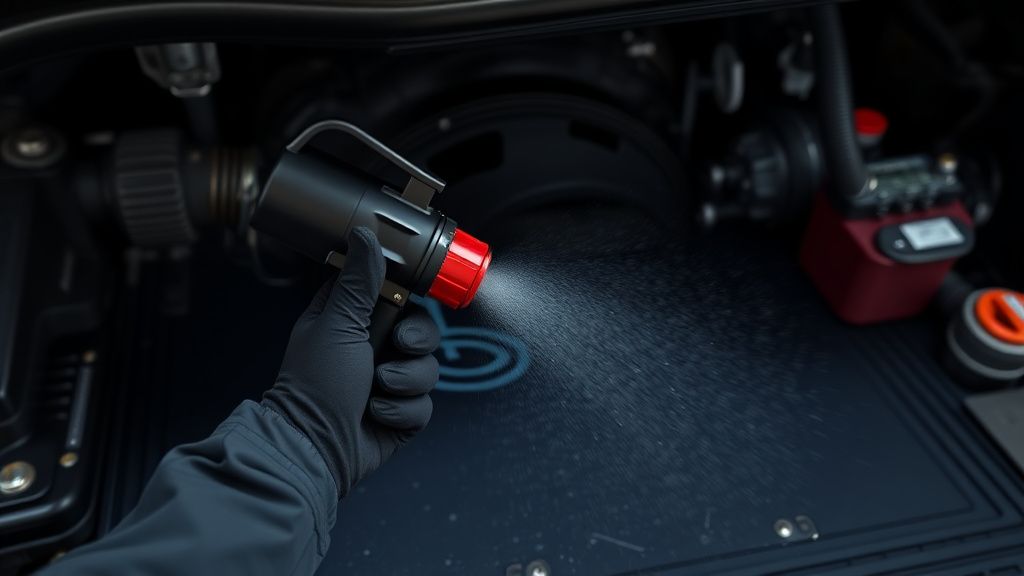
- Path Inspection: Turn the unit over and remove the main brush roll, taking the same care you would if you were fixing an Ecovacs Deebot T9 Error 4 main brush issue. Peer into the intake hole. Shine a flashlight inside to ensure no foreign objects are lodged in the suction tunnel.
- Hard Power Cycle: Hold down the power button for 10 seconds to force a cold boot. Sometimes the internal logic gets stuck in a loop looking for an airflow reading that has already been corrected.
- Reseat the Dustbin: Sometimes the rubber gasket on the dustbin doesn't create a perfect vacuum seal. Remove it and reinsert it with a firm click to ensure the intake path is airtight.
Advanced Fixes (İleri Düzey Çözümler)
If the Quick Fixes fail, you are looking at a hardware-level intervention.
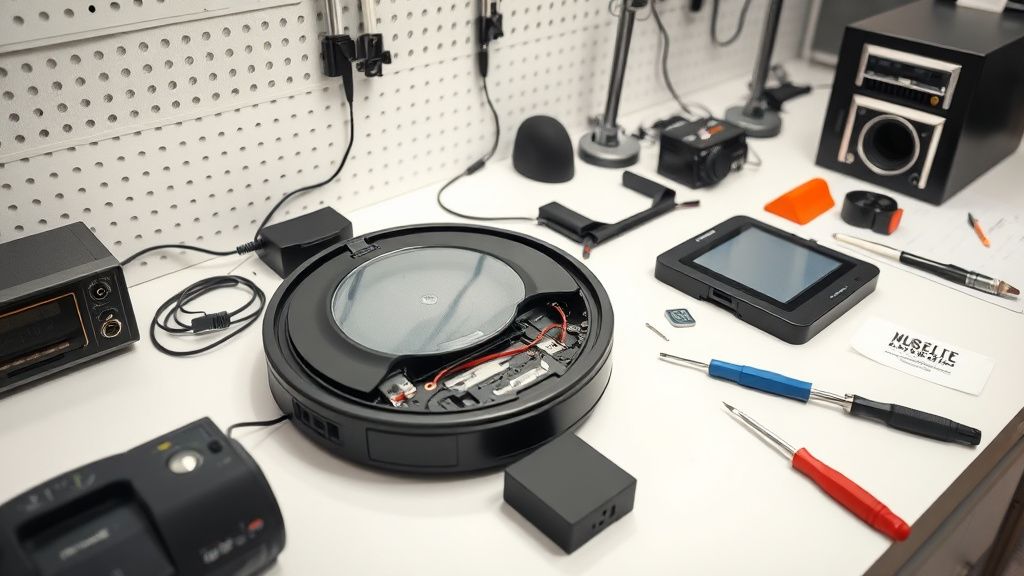
- Disassemble the Top Shell: You will need a Torx T8 and T10 screwdriver. Remove the main brushes and the dustbin. Remove the screws hidden under the rubber plugs on the bottom, and carefully pry the top plastic shell off.
- Inspect the Blower Housing: Once the shell is removed, locate the fan blower unit (usually centered near the back). Check for "stuck" debris inside the intake nozzle leading into the fan.
- The "Spin Test": With the unit open, gently try to spin the fan impeller with a small screwdriver. It should spin freely with minimal resistance. If it feels "gritty" or stiff, the bearings are shot.
- Checking the Air Pressure Tube: There is a tiny, translucent silicone tube that connects the internal chamber to the air pressure sensor on the motherboard. Ensure this tube isn't kinked, disconnected, or clogged with dust. This is a common failure point that tricks the robot into thinking there is a permanent blockage.
Counter-Criticism/Debate: Many online forums suggest "washing" the filter repeatedly to extend its life. However, professional repair technicians argue that this degrades the filtration efficiency (the HEPA rating) and can lead to finer dust entering the blower motor, significantly shortening the lifespan of the unit. We recommend replacing the HEPA filter every 3–6 months rather than washing it indefinitely.
Factory Reset (Fabrika Ayarlarına Döndürme)
If you suspect a firmware glitch or a sensor miscalibration, a factory reset is the final software-side measure.
- Open the top cover of the S7 MaxV.
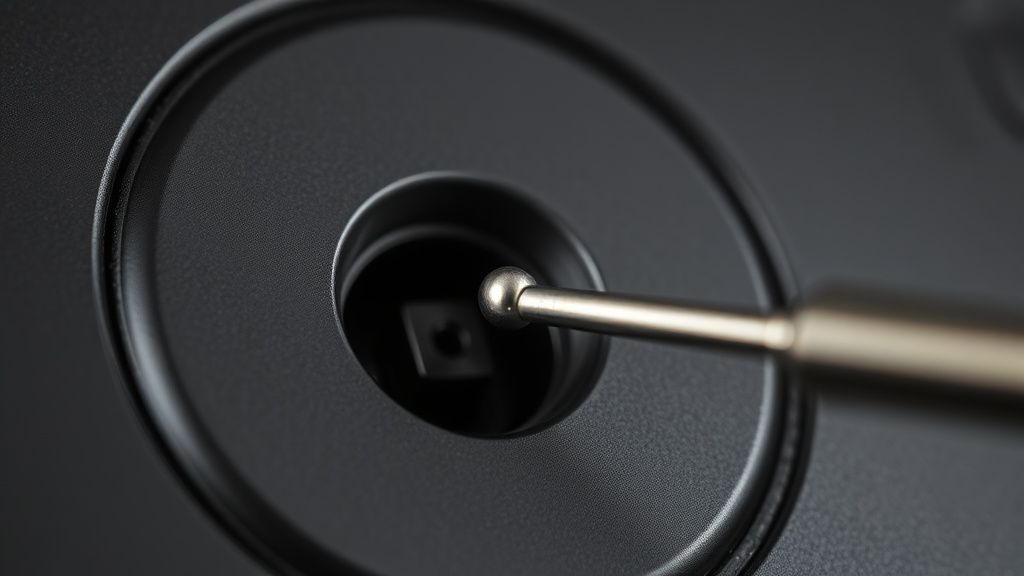
- Locate the small Reset button (usually a tiny hole near the Wi-Fi LED).
- Press and hold the Home button on the unit.
- While holding the Home button, press the Reset button with a pin.
- Keep holding the Home button for 5 seconds until the power light begins to flash.
- The device will announce that it is restoring factory settings. Note: This will wipe all saved maps, schedules, and Wi-Fi credentials.
When to Replace (Ne Zaman Yenisiyle Değiştirilmeli?)
Not every robot can be saved. You should consider the S7 MaxV a "total loss" if:
- Motherboard Corrosion: If the robot has been exposed to liquids (mopping accidents, leaks) and the motherboard shows signs of green oxidation or burnt components, the cost of the board alone often exceeds 60% of the unit's current market value.
- Blower Motor Burnout: If the motor itself is seized or the internal electronics driving it have short-circuited, replacing the entire fan assembly is a high-skill repair that often leads to secondary issues.
- Repair Arbitrage Reality: In the repair industry, we see many users spend $150 on parts for a unit they could replace with a refurbished model for $250. If you aren't comfortable with micro-electronics, don't attempt deep-board repairs. If the repair exceeds $150 in parts or labor, it is time to upgrade.
FAQ
Is it okay to use generic, cheaper HEPA filters?
Can I clear Error 10 by disabling the sensor?
Why does my robot keep giving Error 10 even after I replaced the filter?
Real Field Report: The "Hidden Hair" Phenomenon
In our laboratory, we recently serviced a unit that triggered Error 10 every 15 minutes. The user had replaced the filter and the main brush. Upon full teardown, we discovered a long, tightly coiled clump of human hair that had bypassed the primary intake screen and wrapped around the fan's secondary internal impeller. Because the clump was internal, no amount of external cleaning could resolve it. This highlights the importance of the internal air path inspection; if the external path is clear, the problem is 100% internal. This is a common point of contention where customers claim the device is "broken" while the reality is just a deep-seated physical obstruction. Professional technicians always recommend a full internal inspection before assuming a motherboard fault.