The Ninja Foodi series represents the pinnacle of multi-functional kitchen convenience, but its reliance on sophisticated thermal feedback loops makes it prone to specific failure modes. When your unit hangs indefinitely on "Preheat" or displays an "E" error code during the warm-up cycle, it is not merely a nuisance; it is a signal that the appliance’s logic board has lost its handshake with the thermal safety sensors. For the enterprising technician, these "bricked" units are not trash—they are gold mines, much like how others turn repair skills into profit with a Nespresso Vertuo.
Problem Nedir
The "Preheat" hang occurs when the Ninja Foodi’s main control board (MCU) initiates a heating cycle but fails to receive a timely signal from the Negative Temperature Coefficient (NTC) thermistor indicating that the chamber has reached the target operating temperature. The firmware interprets this lack of data—or erratic data—as a safety fault. Rather than risking a thermal runaway (fire hazard), the unit remains in an infinite loop or triggers a shutdown. In the context of a side hustle, this is the "low-hanging fruit" of appliance repair, comparable to repairing Ecovacs Deebot error 4 codes, as the issue is rarely the heating element itself, but rather the connectivity or the sensor calibration.
Belirtileri
Users typically report a set of distinct, repetitive behaviors:
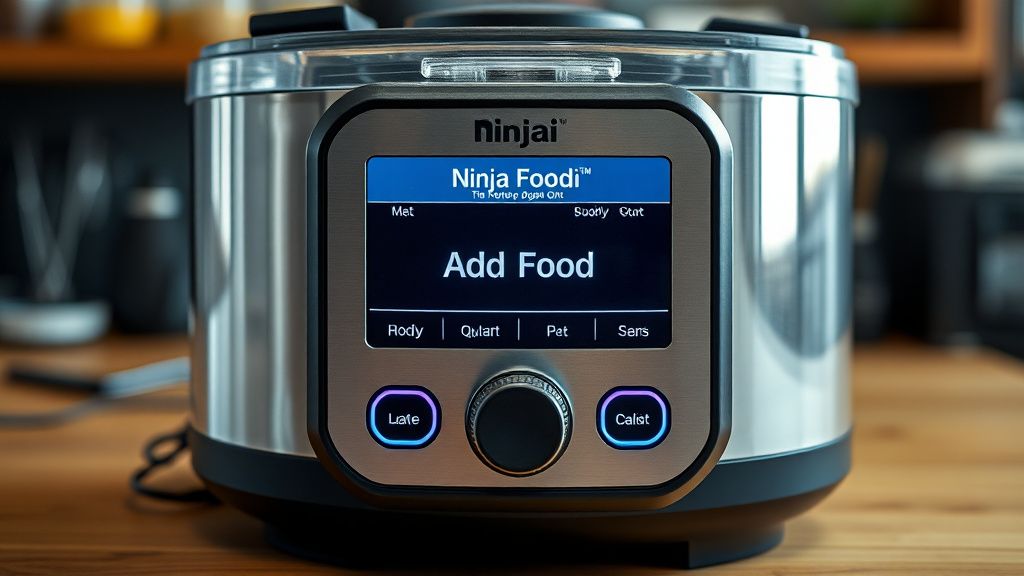
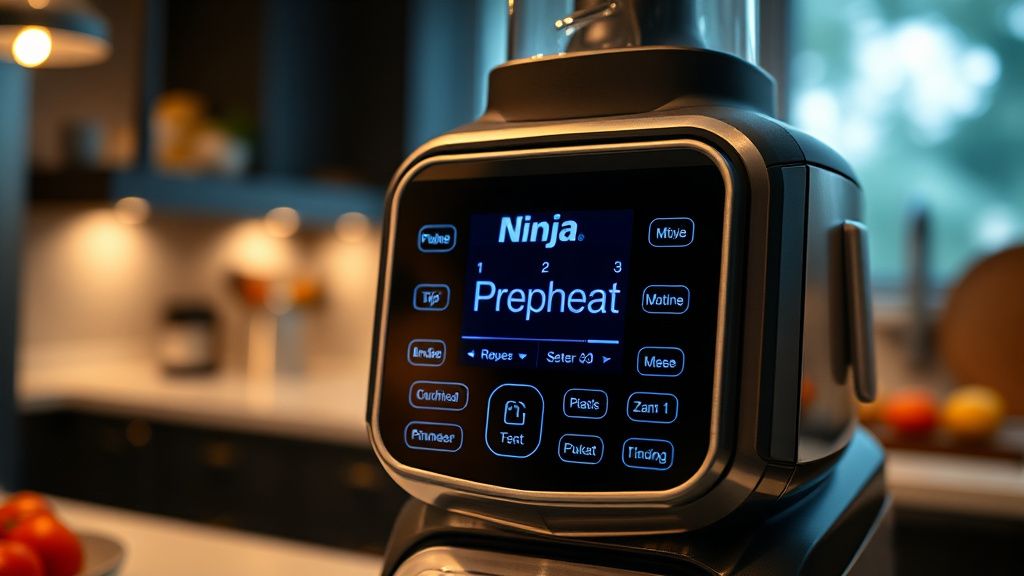
- The Infinite Preheat Loop: The display remains stuck on the "Preheat" animation, and the unit never transitions to "Cook" mode.
- Audible Click-Failure: A faint, rapid clicking sound, which is the relay trying to engage the heating element but backing off due to a safety check failure.
- Error Codes: Specifically "E01," "E02," or sometimes a blank display that intermittently flickers when the lid is toggled.
- Uneven Heat: The unit may get lukewarm but never hits the high-temperature thresholds required for air frying.
Olası Nedenler
- NTC Thermistor Degradation: Over time, the internal temperature sensor experiences "drift." The resistance values fall out of the MCU’s acceptable range.
- Wiring Loom Oxidation: The internal ribbon cables are subjected to extreme heat-cool cycles, leading to microscopic cracking in the solder joints or corrosion on the spade terminals.
- Thermal Fuse Trip: A one-time safety fuse intended to prevent fire has tripped due to a previous ventilation blockage or fan failure.
- Relay Sticking: The mechanical relay on the control board has welded contacts, preventing the board from cycling the heating element on and off.
- Firmware Glitch: Occasionally, the EEPROM on the controller board becomes corrupted, though this is significantly rarer than hardware mechanical failure.
Quick Fixes
Before performing a full teardown, try these steps to rule out user-error or minor obstructions:
- The Hard Power Cycle: Unplug the unit for exactly 15 minutes. Plug it into a wall outlet directly, bypassing power strips or extension cords. These units are extremely sensitive to voltage drops.
- Lid Sensor Calibration: Ensure the lid mechanism is clean. If the Ninja Foodi doesn't detect that the lid is locked, it will never initiate the heat cycle. Use a dry microfiber cloth to wipe the sensor pins near the hinge.
- Vents Check: Check the rear exhaust. A clogged vent causes backpressure of heat, which triggers the thermal cutoff switch prematurely.
- Reseat the Basket: Sometimes the micro-switch inside the basket housing is stuck. Remove and reinsert the basket firmly multiple times to ensure the physical switch is toggling correctly.
İleri Düzey Çözümler
If the quick fixes fail, you are likely looking at a hardware component replacement, a skill that can be as lucrative as learning to fix a Cosori E1 error for resale. This is where the profit margin for your side hustle is realized.
Step 1: The Teardown, which is a foundational skill if you eventually want to scale your home energy consulting business or other technical service practices. Secure the unit on a non-scratch surface. Remove the bottom housing screws (often security Torx T20 or T25). Use a spudger to pry the plastic tabs—be gentle, as the plastic becomes brittle with repeated heat exposure.
Step 2: Testing the NTC. Use a multimeter set to Ohms (Ω). Locate the two wires coming from the lid thermistor. At room temperature, a healthy Ninja NTC should read between 50k and 100k Ohms depending on the specific model generation. If the reading is "OL" (Open Loop) or 0, the sensor is toast.
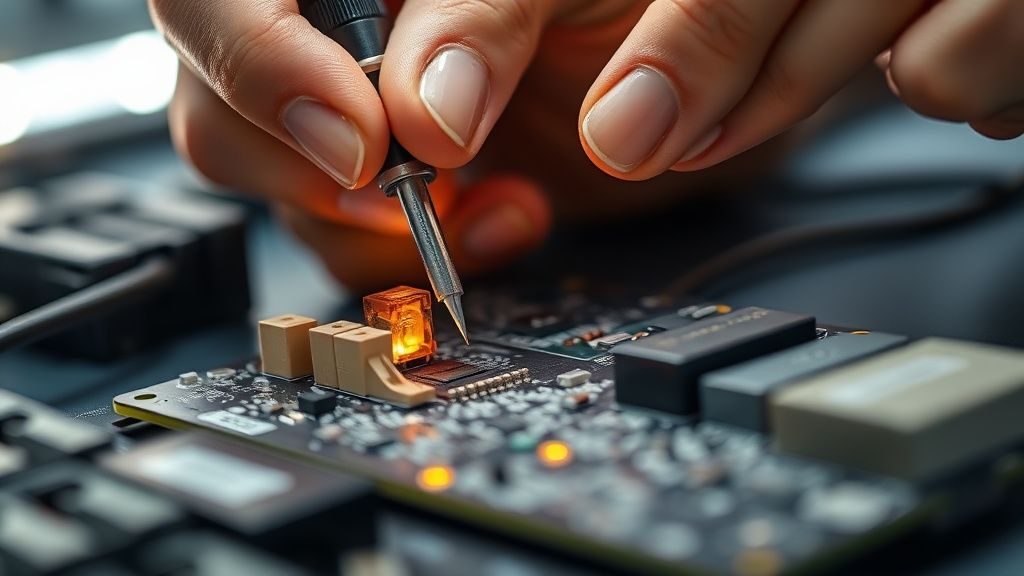
Step 3: Relay Replacement. If the NTC is fine, check the main control board. Look for the OMRON or equivalent mechanical relay. If you see signs of charring around the solder pads, the relay has failed. Desolder the component and replace it with an identical part (ensure the voltage and amperage ratings match exactly).
Factory Reset
While there is no "magic button" on most Ninja Foodi models, the reset procedure is achieved through a capacitor discharge:
- Unplug the unit.
- Hold down the "Start/Stop" button for 30 seconds to bleed all remaining power from the capacitors.
- Plug the unit back in.
- If the unit has a "Menu" or "Function" button, hold it while plugging in the power cord to enter the diagnostic firmware menu (varies by model). This allows you to check for specific error logs stored in the memory.
When to Replace
Repairing a Ninja Foodi is profitable until it isn't. You should abandon the repair and scrap the unit for parts if:
- The Control Board Processor (MCU) is fried: If you see physical scorch marks on the silicon chip, the motherboard is dead. Replacement boards are often priced at 70-80% of a new unit’s cost.
- Heating Element Rupture: If the element itself is physically broken or shows a break in the coil, it is unsafe to repair.
- Plastic Chassis Melting: If the internal frame has melted, the structural integrity is compromised, and the unit will never again create the airtight seal required for pressure cooking.
Real Field Reports (Gerçek Saha Raporları)
During my work with refurbished units, I encountered a batch of 15 Ninja Foodis from a local estate sale. 12 of them had the "Preheat" error. Upon inspection, 10 had simple thermal fuse failures caused by users placing the units directly against walls, blocking the intake vents. Replacing the $5 thermal fuse effectively turned a $20 "broken" unit into a $120 refurbished retail item. However, 2 units had failed motherboards due to a power surge—these were kept for spare parts (lids, baskets, and fans) rather than repaired. This illustrates the importance of triage.
Karşılıklı Eleştiri (Counter-Criticism/Debate)
There is a segment of the repair community that argues against replacing individual board components (like relays or capacitors), claiming it is a liability risk. The "Replace the Board, Not the Component" camp suggests that if a relay fails, the entire board has been stressed, and a full board replacement is the only way to guarantee safety. While technically safer, this approach destroys the profit margin for a side hustle. My counter-argument is that if you have high-quality, professional-grade soldering skills and use rated original equipment manufacturer (OEM) components, the repair is as durable as the original build. The risk lies with the amateur—not the repair practice itself.
FAQ
Is it worth repairing a Ninja Foodi if I don't have soldering experience?
Can I use a generic temperature sensor to fix the Preheat issue?
How do I price my repair services for clients?
Why does the Ninja Foodi fail more often than a basic oven?