
The E2 error on a Philips Air Fryer XXL is a critical signal from the onboard thermal management system indicating a sensor malfunction, specifically within the NTC (Negative Temperature Coefficient) thermistor circuit. While this error often leads consumers to discard their units, for a technician, it represents the heart of the appliance's safety architecture and a viable path toward professional repair services, much like learning to restore high-end espresso machines for profit.
Problem Nedir (What is the Problem?)
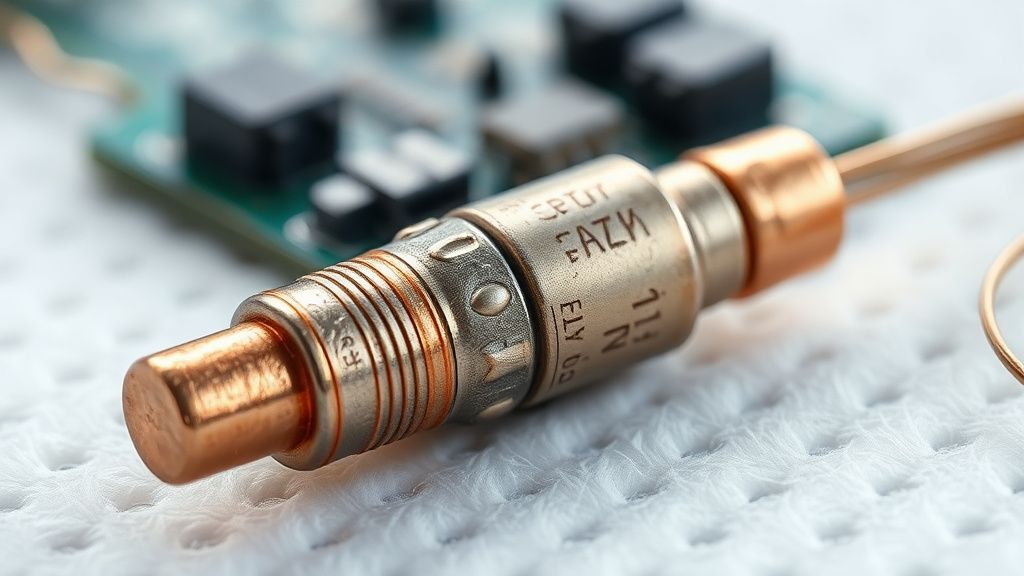
The E2 error code specifically signifies an "Open Circuit" or "Short Circuit" condition in the internal temperature sensing network. Modern air fryers utilize a closed-loop feedback system where an NTC thermistor continuously reports the internal cooking temperature to the main control board (PCB). When the resistance values fall outside the expected operating window (typically between 0 and 500 kilo-ohms, depending on the ambient temperature), the microcontroller detects an anomaly. To prevent a catastrophic fire hazard caused by the heating element running indefinitely, the system defaults to a "Fail-Safe" mode, cutting power to the elements and displaying the E2 error.
Belirtileri (Symptoms)
Users typically report a sudden cessation of heating mid-cycle. The appliance might be running perfectly, and then abruptly, the fan remains on while the heating coil cuts out, and the digital display flashes the "E2" symbol. Common symptoms include:
- The display shows a blinking "E2" immediately upon plugging the unit into the wall outlet.
- The appliance emits a single, persistent beep.
- The unit powers on, but the heating element does not glow or generate heat.
- The touch panel becomes unresponsive except for the power button.
- If the unit is connected to a smart app, it will log a "Temperature Sensor Fault" notification.
Olası Nedenler (Possible Causes)
The E2 error is rarely a "mystery" glitch; it is almost always a physical failure within the hardware. Primary causes include:
- Sensor Oxidation: Exposure to moisture, grease vapor, and acidic food particles over years of usage can oxidize the sensor terminals.
- Thermal Fatigue: The wiring leads connecting the NTC sensor to the control board are subjected to extreme heat cycling (expansion and contraction). This frequently causes the fine-gauge wires to become brittle and snap.
- Main PCB Relay Failure: While less common, the triac or relay on the main control board responsible for reading the sensor voltage can burn out, creating an open circuit on the logic side.
- Heat-Damaged Wiring Harness: If the air fryer has been subjected to poor ventilation, the insulation on the internal wiring can melt—an issue of thermal management similar to why your 4K smart TV overheats due to improper airflow.
Quick Fixes (Hızlı Çözümler)
Before committing to a teardown, verify that the error is not due to a transient power surge or a temporary sensor communication hang-up, much like the Roomba Error 15 internal communication failure.
- Hard Power Cycle: Unplug the device and leave it disconnected for at least 30 minutes. This allows the capacitors on the main control board to fully discharge, which can reset the latching logic of the error code.
- Contact Cleaning: If you have access to the base, check for any visible residue or debris that may be obstructing airflow near the sensors.
- Firmware Sync: If your model is a "Connected" variant, ensure the app is not reporting a pending firmware update. Occasionally, a interrupted update can leave the controller in a state where it misinterprets sensor feedback.
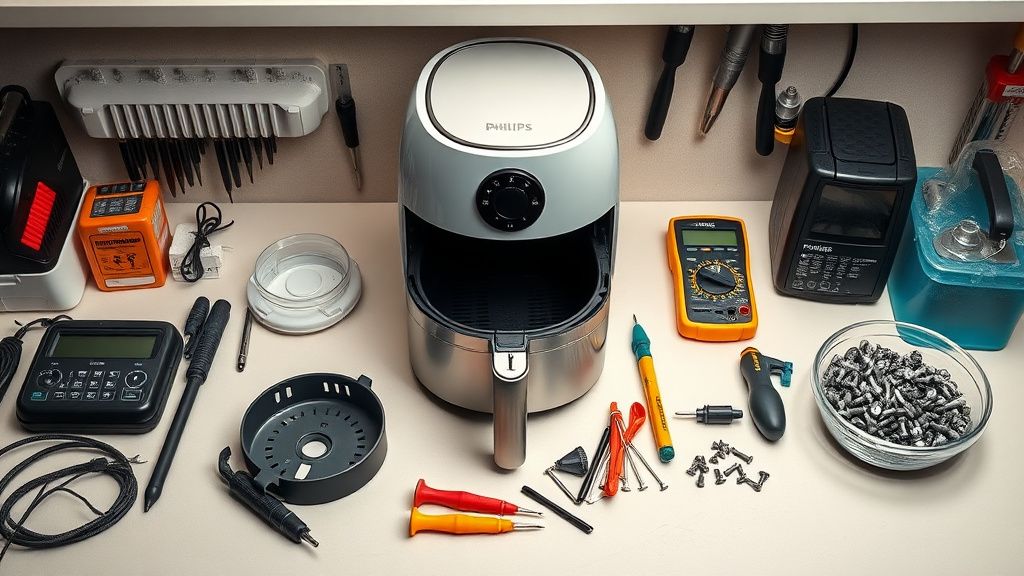
Advanced Fixes (İleri Düzey Çözümler)
When quick fixes fail, you must transition into a diagnostic repair methodology.
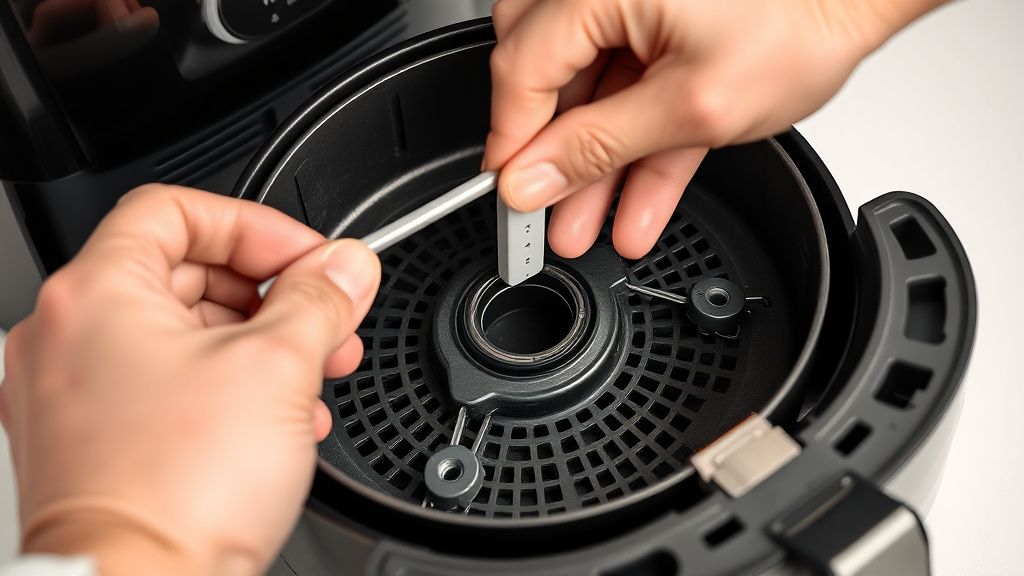
Step 1: Resistance Testing
Using a digital multimeter set to Ohms, measure the resistance across the NTC sensor leads. You will need to dismantle the rear and top cowling of the fryer.
- A healthy sensor should show a fluctuating value as you apply gentle heat (e.g., with a hair dryer).
- An "OL" (Open Loop) or "0" reading indicates a broken wire or a fried sensor bead that requires replacement.
Step 2: Wiring Harness Restoration
Often, the wire snaps directly at the crimp point where the sensor enters the cooking chamber. You do not necessarily need a new sensor if the bead is intact; you can strip back the insulation, solder a fresh length of heat-resistant Teflon-coated wire, and use high-temperature glass fiber sleeves to insulate the splice. Standard electrical tape will melt; use Kapton tape or heat-shrink tubing rated for 200°C+.
Step 3: PCB Inspection
If the sensor shows correct resistance (e.g., 50k ohms at room temperature), the fault lies on the PCB. Inspect the solder joints on the back of the board where the sensor ribbon cable connects. Look for "cold" solder joints—dull, grey, or cracked-looking connections—and reflow them with fresh eutectic solder.

Factory Reset (Fabrika Ayarlarına Döndürme)
Most Philips XXL models do not have a "button combination" factory reset. Instead, they utilize a "Capacitor Discharge Reset."
- Unplug the device.
- Hold down the "Start/Pause" button for 60 seconds while the unit is unplugged.
- Plug the unit back in while continuing to hold the button for another 10 seconds.
- Listen for a confirmation beep. If the error code was a software latch, this will clear it.
When to Replace (Ne Zaman Yenisiyle Değiştirilmeli?)
As a technician, you must know the "point of no return." You should recommend a replacement under the following conditions:
- PCB Scorching: If there is visible carbon scoring or blown components on the main power board (usually caused by a high-voltage short), the risk of future fire is too high to repair safely.
- Heating Element Degradation: If the heating element itself is pitted, corroded, or showing signs of metal fatigue (cracks), it will eventually fail. The cost of a replacement heating element plus labor often exceeds the market value of a refurbished unit.
- Plastic Chassis Structural Failure: Air fryers rely on a precise airflow path. If the inner plastic housing has melted or warped due to an extreme over-temperature event (often why the sensor failed in the first place), replacing the electronics will not restore the appliance to safe, operational efficiency.
Gerçek Saha Raporları (Real Field Reports)
In the field, we encounter a recurring narrative: "I was cooking bacon, and the unit just died." Analysis of these units reveals that grease buildup is the primary enemy. In one instance, a unit returned with an E2 error showed that the vaporized grease had migrated into the NTC sensor housing, essentially "caking" the sensor in carbon. While the sensor was functional, the thermal insulation provided by the carbon prevented it from reading the actual air temperature, leading to a thermal runaway that triggered the E2 error.
Karşılıklı Eleştiri (Counter-Criticism/Debate)
There is a significant industry debate regarding the "Right to Repair" versus "Safety Certification." Manufacturers argue that air fryers are high-wattage appliances that operate near the ignition point of grease. By making the internals difficult to reach, they argue they are preventing "amateur" repairs that could lead to house fires. However, independent repair shops argue that this planned obsolescence creates massive environmental waste. Our professional stance is that repair is viable, but only when performed using high-temperature-rated components and proper electrical safety standards. Using standard household wires instead of high-temp rated cables is a common, dangerous error made by DIYers that justifies the manufacturer's cautious stance.
FAQ
Is the E2 error dangerous to ignore?
Can I just bypass the sensor with a resistor?
Why does my air fryer smell like burning plastic when it shows E2?
Is the E2 error covered by warranty?