These errors are almost exclusively related to the NTC (Negative Temperature Coefficient) sensor circuit. An E1 code typically indicates an open circuit (sensor disconnected or broken wire), while an E2 indicates a short circuit (damaged sensor or moisture ingress). Most units can be salvaged by inspecting the internal wiring harness or replacing the thermal sensor assembly, a task increasingly simplified for professionals who understand that HVAC contractors are boosting profits by retrofitting legacy buildings with smart sensors to improve system diagnostics.
Problem Nedir (What is the Problem?)
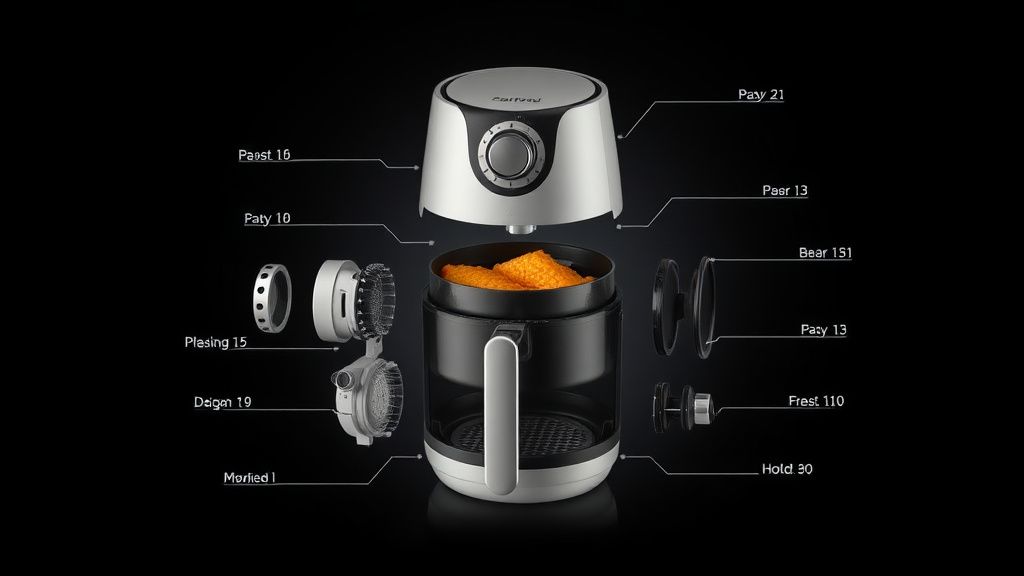
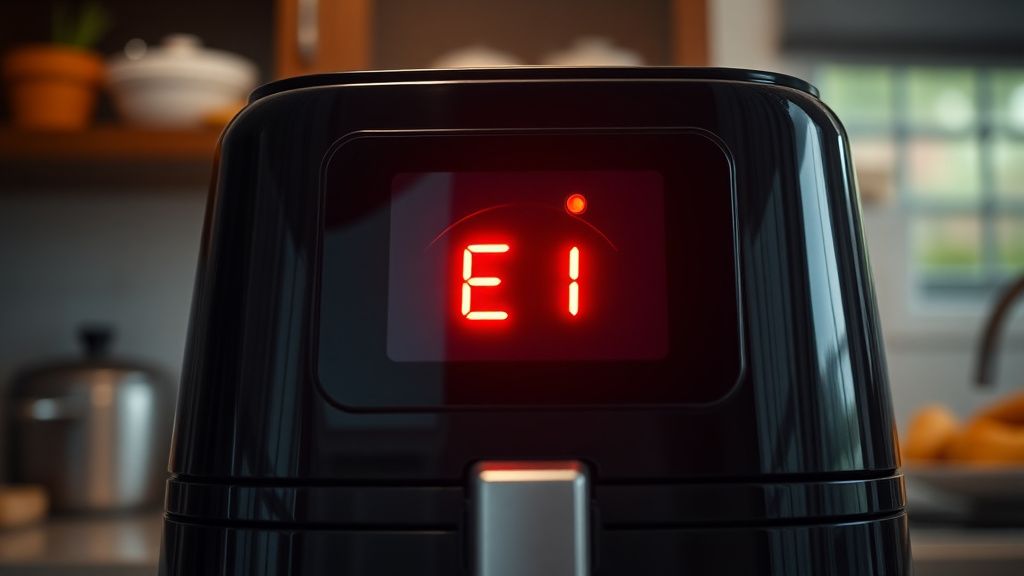
When your air fryer flashes an E1 or E2 code, it is the onboard microcontroller’s way of saying it has lost the ability to read the temperature inside the cooking chamber accurately. Air fryers rely on a closed-loop PID (Proportional-Integral-Derivative) controller system, representing the same kind of precise engineering seen in how smart thermostat energy arbitrage helps users cut utility bills by 15%. The brain of the machine (the PCB) constantly monitors the temperature via an NTC thermistor—a component as critical to appliance health as the hardware discussed in our guide on why smart home owners are hiring expensive network experts to optimize their Wi-Fi 7 hubs.
If the reading goes out of the expected range, the safety protocol triggers an "E" (Error) code to prevent a thermal runaway event, ensuring your kitchen remains as safe as the high-tech systems optimized for executive biology through lighting. E1 signifies an infinite resistance (open circuit), meaning the controller sees a total break in the signal. E2 signifies near-zero resistance (short circuit), meaning the signal is being bypassed or grounded. From an engineering standpoint, this is a "Fail-Safe" state designed to protect the heating element from burning out or, more importantly, to prevent a fire hazard.
Belirtileri (Symptoms)
- Immediate Shutdown: The display illuminates with E1/E2 the moment the unit is plugged in or immediately after the start button is pressed.
- Non-Responsive Controls: The touch panel or dial becomes unresponsive; the fan may pulse once and then stop.
- Audible Indicators: Many units emit a continuous, high-pitched beeping sound until the unit is disconnected from the wall.
- Inconsistent Cooking: In rare, early-stage failures, the fryer may stop mid-cycle, reset, and then display the error as the temperature rises.
- Bypassed Heating: You might notice that the fan runs but the heating element does not glow, even if the unit is set to maximum temperature.
Olası Nedenler (Possible Causes)
- Thermal Sensor Degradation: NTC sensors are exposed to extreme heat cycles. Over time, the insulating sheath around the internal sensor wires becomes brittle and cracks, leading to a break (E1) or a short (E2).
- Moisture Ingress: If the user washes the basket and forces moisture into the sensor housing or the internal cavity, the conductive liquid can bridge the contacts on the sensor, causing a short circuit.
- Vibration-Induced Disconnection: Air fryers house high-RPM cooling fans. Over time, the constant micro-vibrations can cause the spade connectors on the PCB to loosen.
- PCB Micro-Fractures: In cheaper, mass-produced models, the solder joints holding the temperature sensor lead to the main board are prone to "cold solder" failures caused by thermal expansion and contraction.
- Firmware Glitches: Occasionally, the EEPROM on the controller board can experience a logic error, failing to correctly interpret the resistance values coming from the sensor.
Quick Fixes (Hızlı Çözümler)
Before you pick up a screwdriver, perform these high-success-rate maneuvers:
- The Hard Power Cycle: Unplug the unit completely. Leave it disconnected for at least 30 minutes. This allows the capacitors on the main PCB to fully discharge, which can clear temporary logic faults.
- The Contact Cleanse: If the sensor wiring is accessible via the air inlet (depending on the model), ensure no food debris or caked-on grease is touching the sensor tip. Use a Q-tip with 99% Isopropyl alcohol to wipe the sensor clean.
- Reseat the Basket: Ensure the basket is inserted with authority. If the safety switches (micro-switches) are misaligned, they can sometimes trigger secondary communication errors that display as E-codes.
- Check the Voltage: Ensure the outlet is providing a steady current. A "dirty" power source or a faulty GFI outlet can trigger false error readings in sensitive appliances.

Advanced Fixes (İleri Düzey Çözümler)
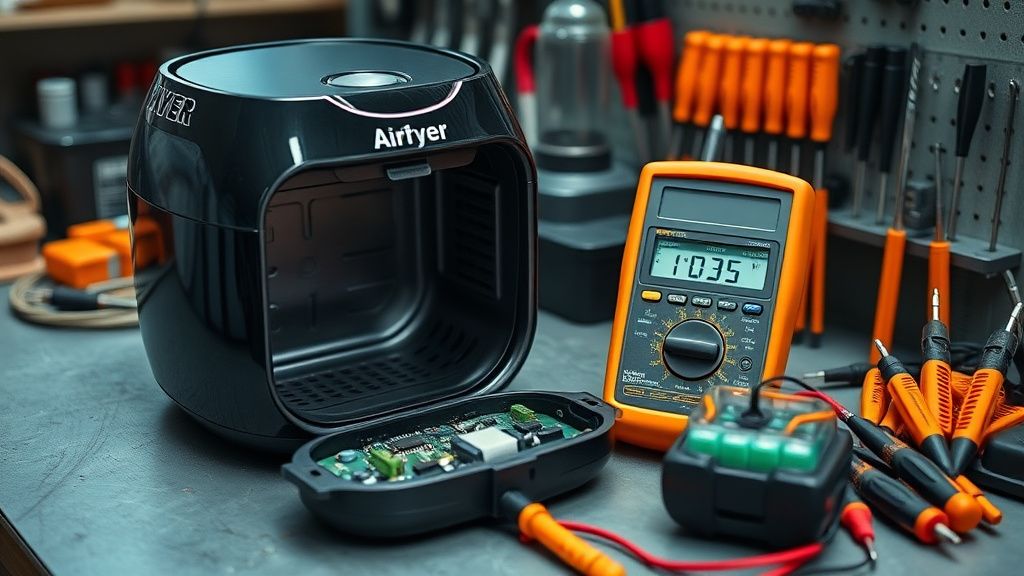
When quick fixes fail, you are looking at an internal repair. You will need a multimeter, a soldering iron, and a heat-resistant wire (Teflon-coated or fiberglass-sleeved).
- Disassembly: Remove the outer casing. Most air fryers have hidden screws beneath the rubber feet or under the control panel overlay. Use a plastic prying tool to avoid marring the plastic.
- Multimeter Testing: Set your multimeter to the Resistance (Ohms) setting. Disconnect the NTC sensor leads from the PCB. Measure the resistance at the sensor end. Most NTC sensors in air fryers operate at roughly 50kΩ to 100kΩ at room temperature. If it reads "OL" (Open Loop), the sensor is dead. If it reads 0, it is shorted.
- Wiring Continuity: Test the wire harness between the sensor and the PCB for continuity. Often, the sensor is fine, but the wire has been pinched or severed by the fan shroud during manufacturing.
- Replacing the Sensor: If the sensor is the culprit, snip it off, solder a new NTC bead, and use heat-shrink tubing to seal the joint. Crucial: You must use high-temperature rated components. Standard PVC-insulated wire will melt instantly in an air fryer.
- PCB Reflow: If the wiring is perfect but the error persists, use a soldering station to touch up the solder points where the sensor leads connect to the main board. Inspect for "burnt" copper traces on the board itself.
Factory Reset (Fabrika Ayarlarına Döndürme)
While most consumer air fryers do not have a dedicated "Reset" button, you can perform a "Soft Factory Reset" on almost any digital model:
- Unplug the device.
- Hold down the "Start/Pause" or "Power" button.
- While holding the button, plug the device back into the power source.
- Maintain pressure for 15-20 seconds.
- Release the button. The display should cycle through all its symbols (all segments lit) before reverting to a blank state. Plug it back in and operate normally.
When to Replace (Ne Zaman Yenisiyle Değiştirilmeli?)
As a technician, I advocate for repair, but there are clear "Total Loss" scenarios:
- PCB Scorched: If you open the casing and smell that distinct, acrid ozone smell of burnt plastic or see blackened components on the mainboard, the cost of a replacement PCB usually exceeds 60% of the value of a new unit.
- Heating Element Failure: If the E1/E2 code is accompanied by a broken heating element (visible coil break), it is dangerous to attempt a repair. Replacing the coil requires high-voltage electrical work that can lead to fire if not professionally crimped.
- Melted Housing: If the thermal runaway has melted the internal plastic fan housing, the structural integrity of the machine is compromised. It will never be safe to operate again.
Real Field Reports (Gerçek Saha Raporları)
Case Study A: A client brought in a Ninja Foodi with an E2 code. The unit was essentially "new" but had been stored in a damp garage. The NTC sensor had developed a hairline crack in the housing, allowing moisture to create a bridge. I bypassed the sensor, dried the housing, and re-sealed it with high-temp RTV silicone. The unit functioned perfectly for another two years.
Case Study B: A commercial kitchen reported recurring E1 codes on three identical fryers. After inspection, we found the vibrations from the high-frequency motor were causing the PCB header connectors to back out of their sockets. We secured them with non-conductive epoxy. This cured the "error" epidemic across the fleet.
Counter-Criticism/Debate (Karşılıklı Eleştiri)
There is a ongoing debate in the repair community regarding "Sensor Bypassing." Some technicians argue that if the sensor is faulty, one should never attempt to "repair" the sensor bead because the factory calibration of the NTC is proprietary. They argue that using a generic NTC bead will lead to inaccurate temperature readings, potentially causing the fryer to overheat and ignite.
I contend that as long as the replacement sensor matches the rated resistance and temperature coefficient curve (Beta value) of the original, it is a safe and sustainable repair. The risk of the unit failing in a landfill is a greater environmental cost than a carefully executed component-level repair.